Export
Export filtered timesheet data from Kimai as PDF, XLSX, CSV, or HTML
The export screen lets you download filtered timesheet data in different formats. You can use it for a quick customer report, an internal Excel analysis, or a CSV file for another system.
You can find it at Time Tracking > Export.
Export vs. invoice
Both features work with timesheet data, but they serve different goals:
- Use export when you want to download filtered timesheet data in a reusable file format
- Use invoice when you need a billing document with calculations like taxes and invoice numbers
- Exports can be created without selecting one dedicated customer
- Invoices are always customer-based
Supported output formats:
| Module | Formats |
|---|---|
| Export | PDF, XLSX (Excel), CSV, HTML (print view) |
| Invoice | PDF, HTML, XLSX (Excel), ODS (OpenDocument), DOCX (Word) |
If you need automation or integration, you can also use the API to export data.
How export works
The workflow is always the same:
- Open
Time Tracking > Export - Filter the timesheet records you want to include
- Choose a built-in format or one of your saved templates
- Download the file
Always use your custom template instead of choosing the default column setup, which can change over time.
Supported formats
Kimai supports these export formats:
- PDF for a fixed, easy-to-share document
- XLSX (Excel) for calculations, pivots, and internal reporting
- CSV for importing data into accounting, BI, or other business systems
- HTML for a browser-friendly print view that you can review or save as PDF
Export state
Invoices and exports share the same export state. It is used to mark timesheet records as processed.
Exported records:
- are locked for regular users
- are excluded by default from later exports and invoices
- can be marked automatically during export
To set that state automatically, enable the checkbox before creating the export.
For more details, read the timesheet documentation.
Reusable export templates
Kimai includes ready-to-use export buttons and also supports reusable templates for recurring exports. This is useful if you often need the same columns, language, or file format. The template editor is meant for reusable PDF, XLSX and CSV exports. If you want to change the layout of PDF or HTML exports, use custom Twig templates instead.
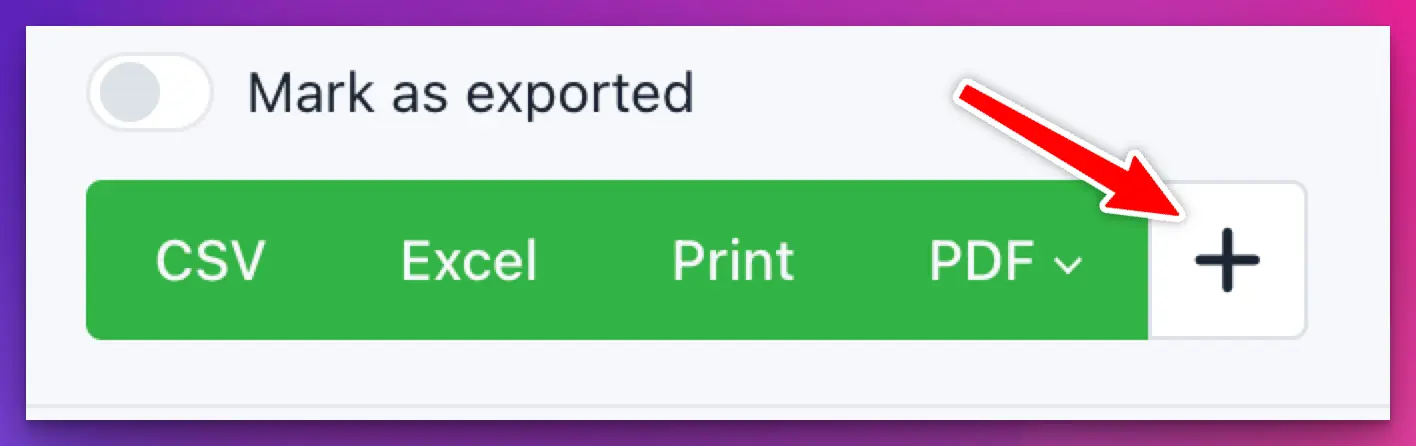
After filtering timesheets, you will see the export buttons. Next to them is the button, which opens the template dialog.
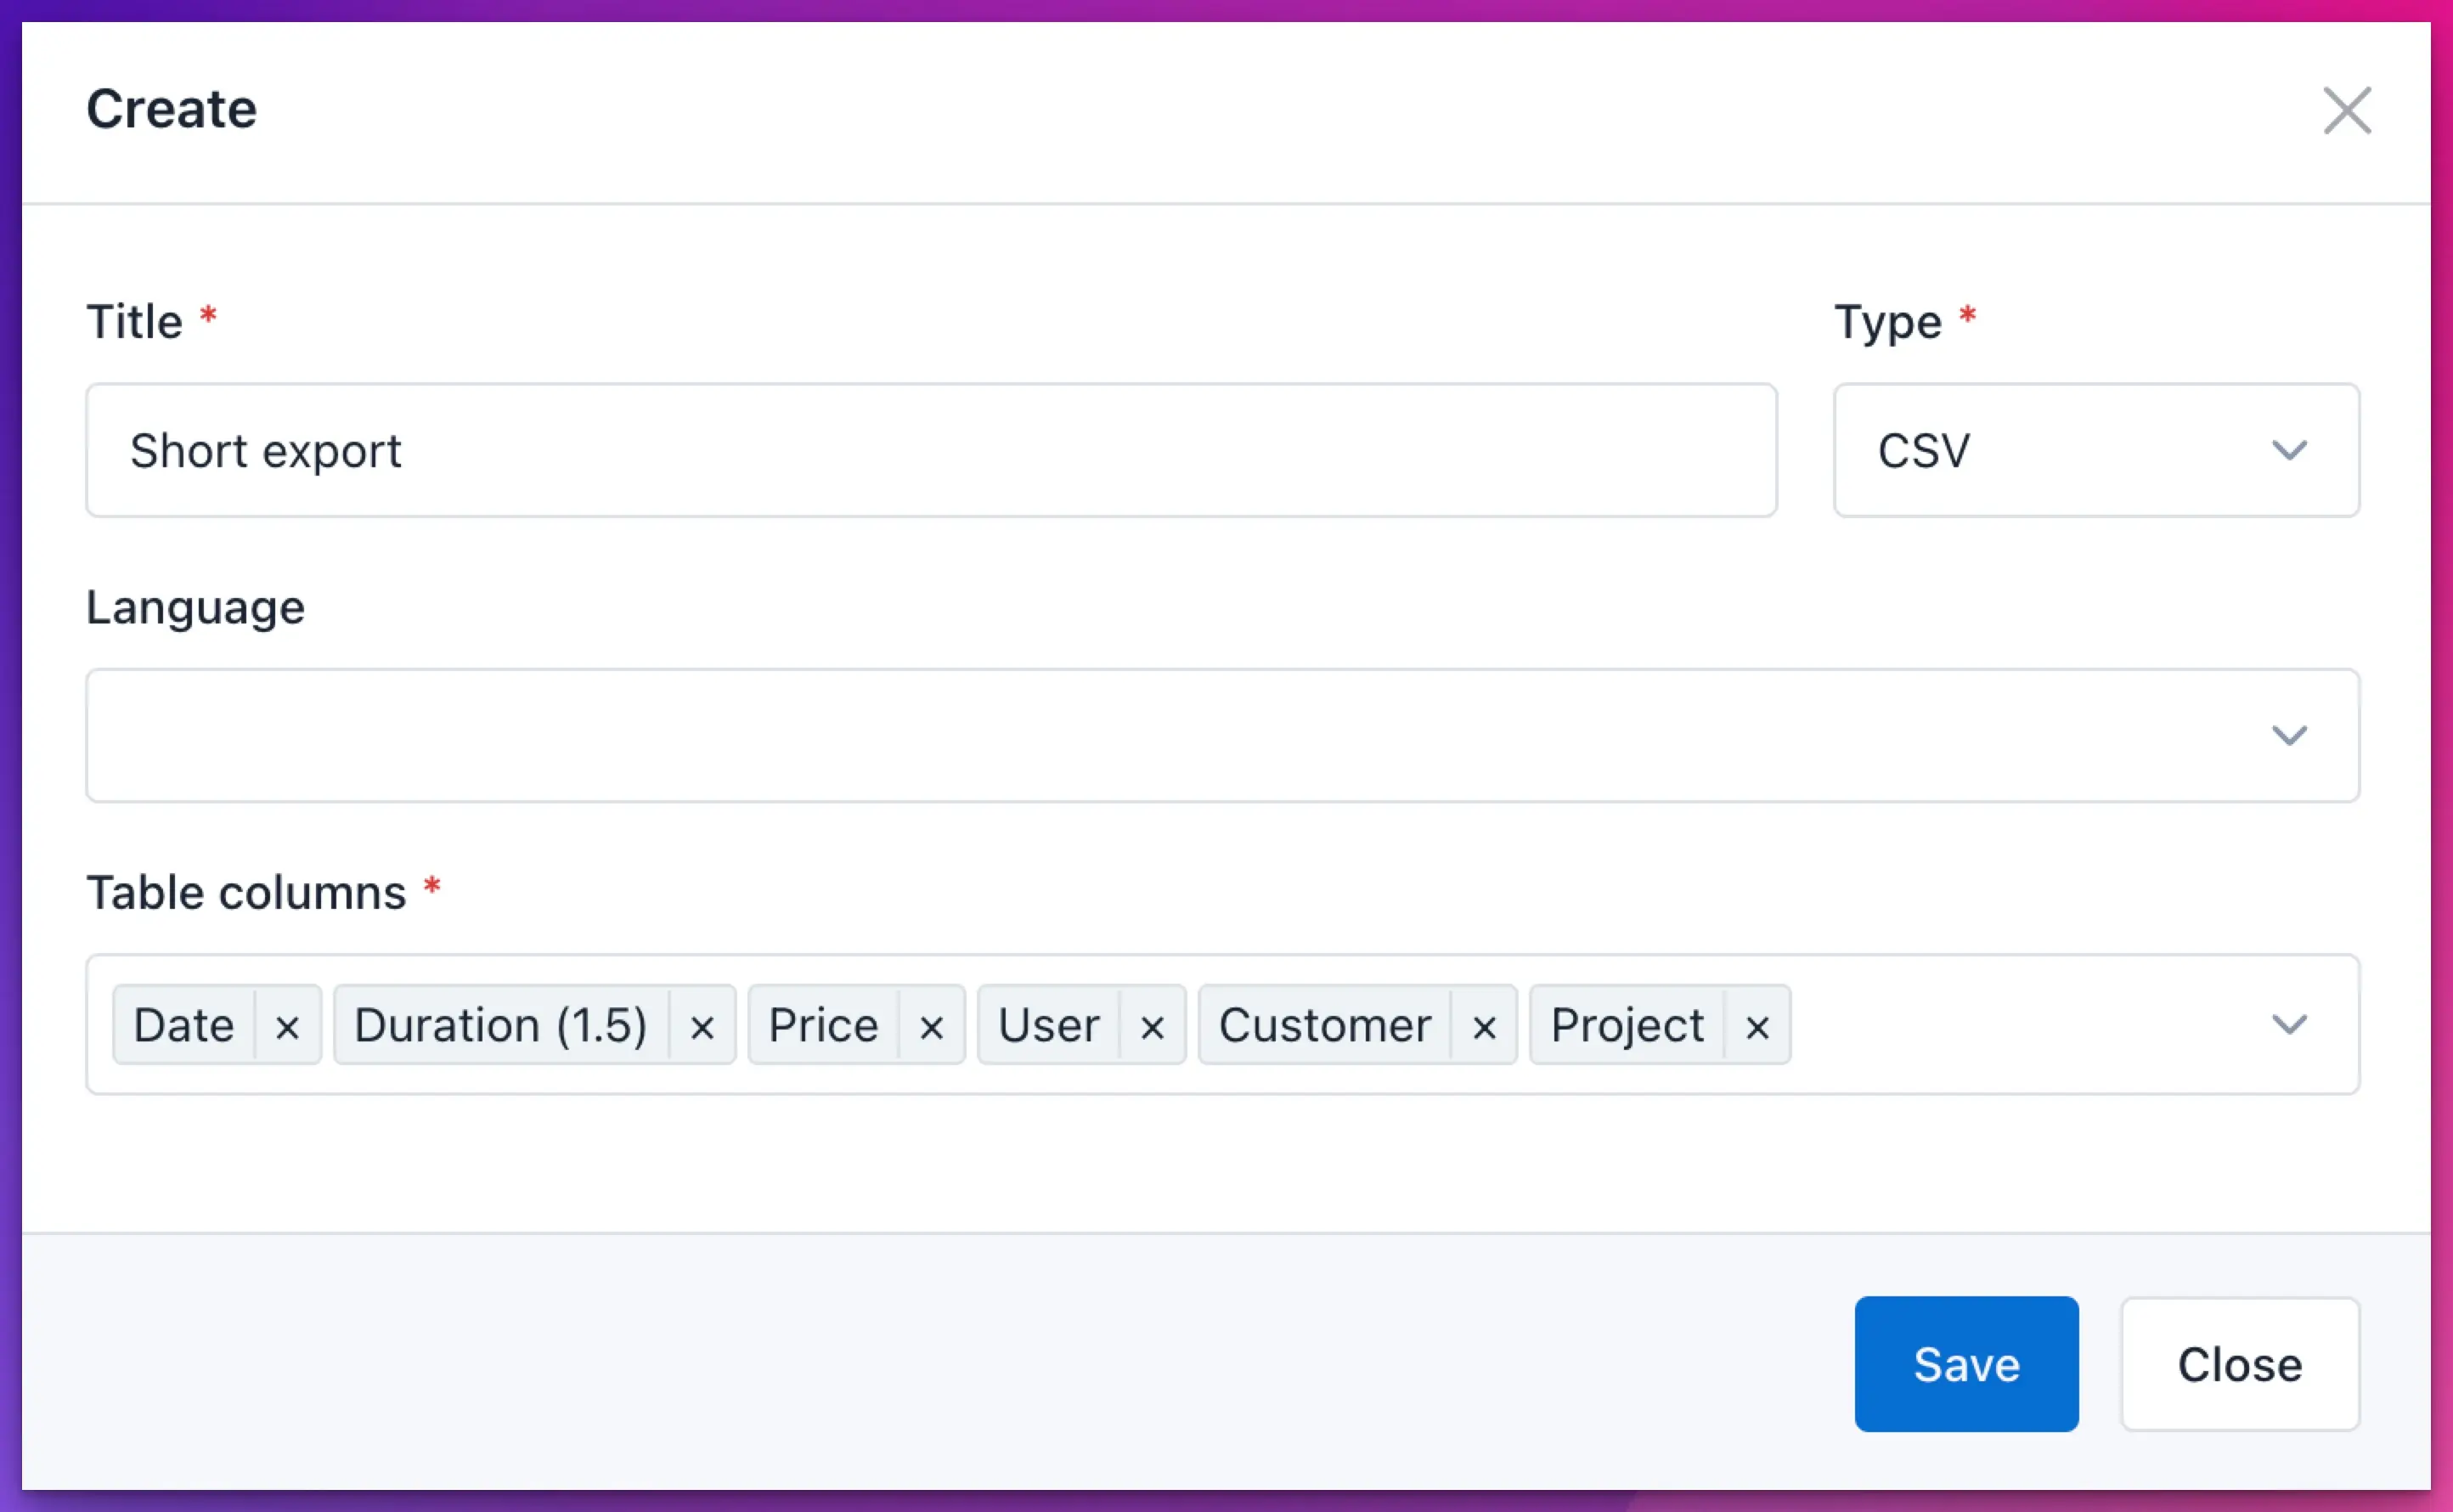
In the template, you can define:
- the exported file
typesuch asPDF,CSVorExcel - the
languagefor translated column headers - the
columnsthat should be exported - whether the template is shared with all users through
Allow access for all users
The selected language controls header translations. If you do not set one, Kimai uses the current request language.
Create a template
- Filter the data you want to export
- Click the button
- Enter a name for the template
- Choose the file type and columns
- Save the template
The export button for that format will then show a dropdown, so you can reuse the template later.
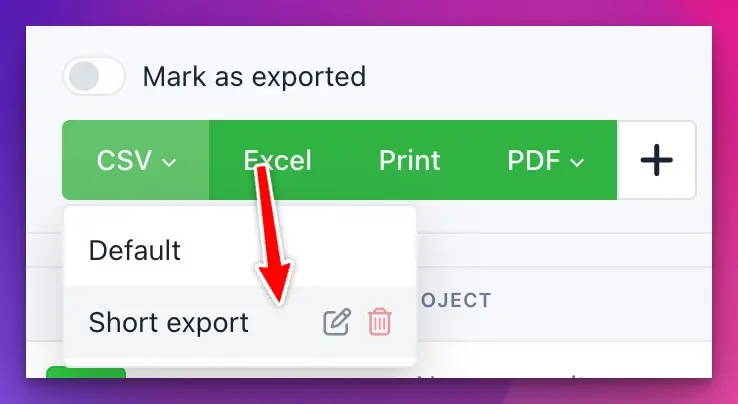
When you hover a saved template in the dropdown, you can edit or delete it.
PDF option
- Title
- Summary (export column summary on the first page of the PDF)
- Font (pick one from the built-in list of fonts)
- Page size (A4, A5, A6, Legal, Letter)
- Orientation (Portrait or Landscape)
CSV option
CSV templates support an additional setting:
Separatorwith comma or semicolon
Share templates with care
Enabling Allow access for all users makes the template available in My times and All times.
These export views do not re-check every sensitive permission. If a shared template contains rate columns, all users who can use that template will see those rates, even if they normally do not have permission to view them.
Custom PDF and HTML templates
If you need your own branding, layout, or special formatting, you can create custom Twig templates for PDF and HTML exports. This is an advanced topic and usually only needed for company-specific workflows.
How to create your first template:
- Copy & paste the default templates
- Read the dedicated chapter about PDF templates
- Adjust the template to your needs and add it to Kimai
- Cloud users have to send their template to the support via
support@kimai.cloud - OnPremise users store their export templates in the directory
var/export/(you might have to create it on first use)
Be aware of the following rules:
- HTML templates have the file extension
.html.twig - PDF templates have the file extension
.pdf.twig - Use unique filenames and prefix them with your company name, for example
company-export.html.twig - The names
timesheet.html.twig,timesheet.pdf.twig,default.pdf.twig, anddefault.html.twigare reserved - After updating an existing template, you have to clear the cache to see the results
Access custom fields in PDF templates
You can access custom fields with entry.metaField('name').
Always protect the call in case the custom field does not exist:
{% set cf = entry.metaField('example') %}
{% if cf is not null and cf.value is not null %}
    {{ cf.value }}
{% endif %}
Time format
The following information is partly outdated, as you define the duration type in your custom export template. This toggle and behaviour will be removed in the future.
Only the default templates still use this user-based setting. For recurring workflows, define the required duration output directly in your custom template instead of relying on the default templates.
Kimai supports both natural and decimal duration formats:
naturalformat such as1:15is usually easier to readdecimalformat such as1.25is better for calculations
You can choose the format in your user preferences.
Open your username menu in the top right and select Preferences.
The setting Use decimal duration in export switches between the two versions:

Automation and integrations
If you need exports outside the UI, Kimai also supports:
- the REST API for integrations and custom workflows
- the command line exporter for scheduled or scripted exports
Permissions
The export feature does not respect every view permission.
If users must not see rates or other sensitive columns, do not grant them create_export and do not share such templates with them.
- The export does not guarantee to respect permissions like
view_rate_other_timesheetandview_rate_own_timesheet - The “mark as export” checkbox is only available for users with the
edit_export_other_timesheetpermission
| Name | Description |
|---|---|
create_export |
See the Export page at Time Tracking > Export and create export documents from the selected timesheet data |
create_export_template |
Create, edit and delete Export templates (CSV and Excel) |
Read how to assign these permissions to your user roles in the permission documentation.