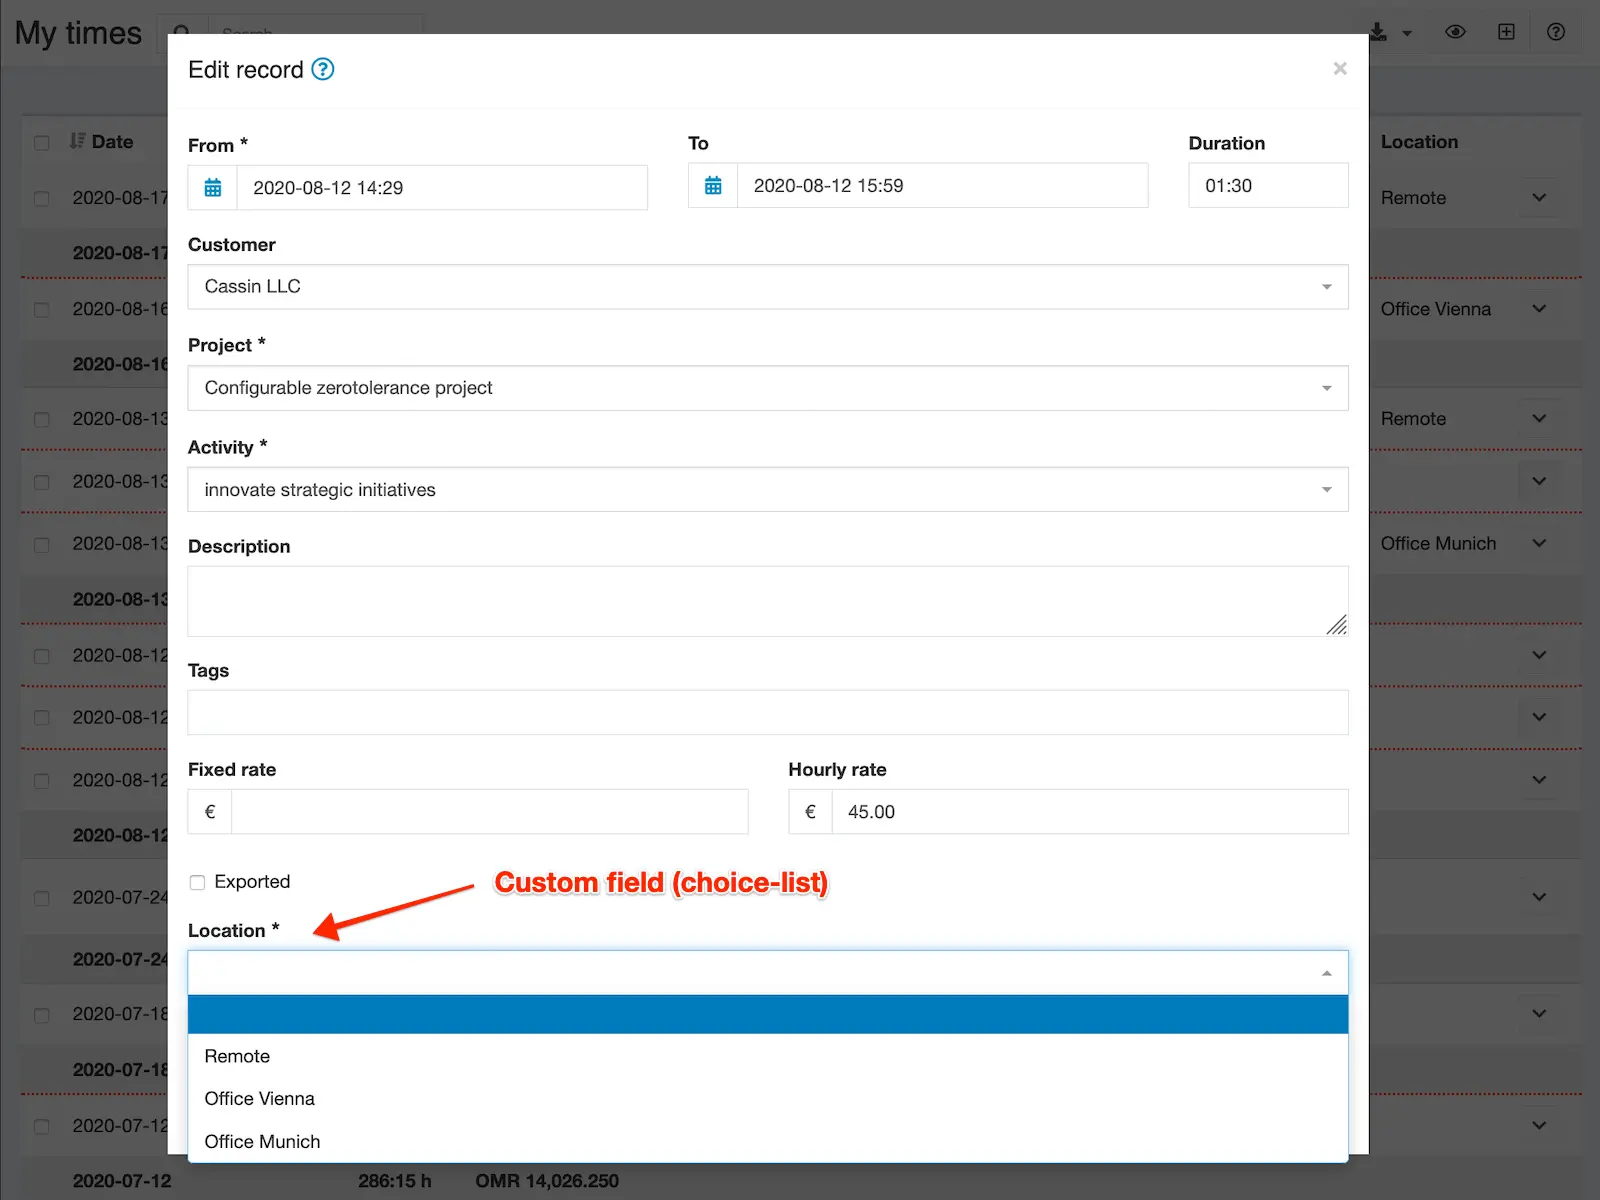
Eigene Felder
Frei konfigurierbare Zusatzfelder für Zeiterfassung, Kunden, Projekte, Aktivitäten, Benutzer (und mehr) in verschiedenen Formaten. Diese Felder können optional oder verpflichtend sein und durch Berechtigungen eingeschränkt werden.

Kevin Papst
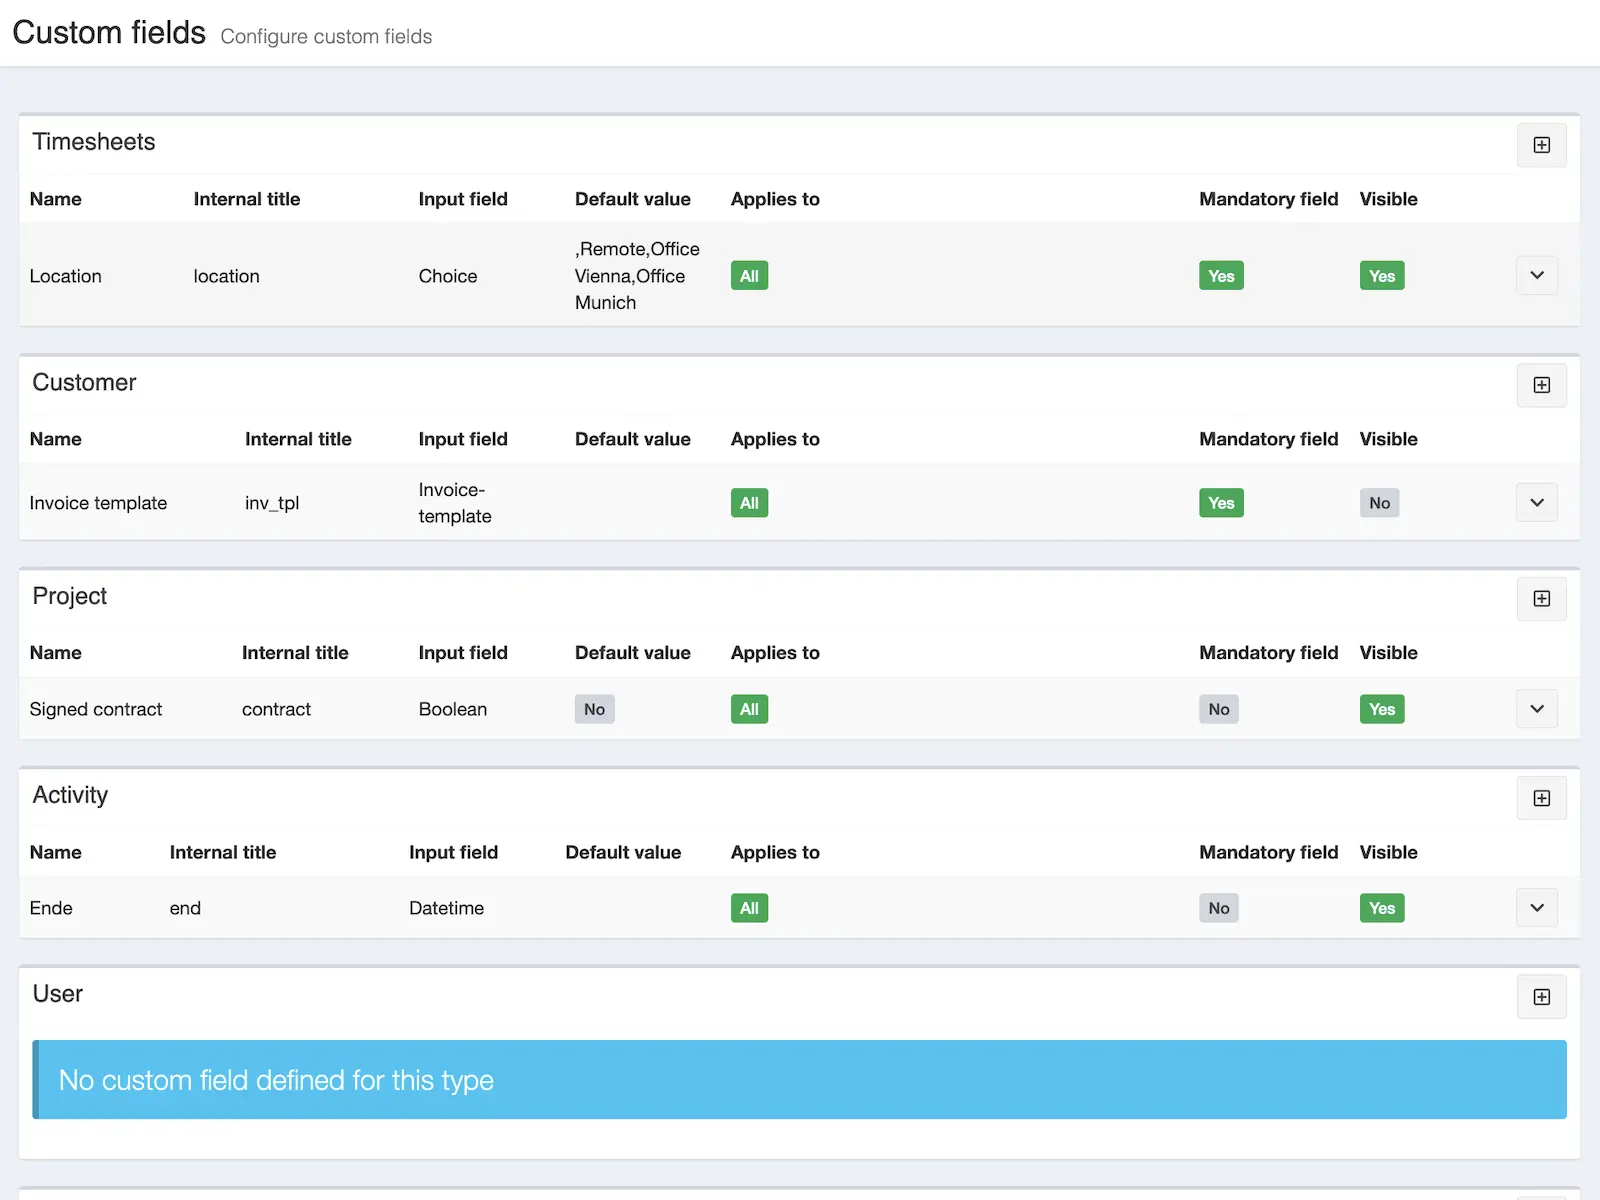
Allows configuration of additional (custom) fields for:
Timesheets, Customers, Projects, Activities, Invoices, User, Expenses (see plugin).
Features
You can create as many fields as you want for each data type, where each field:
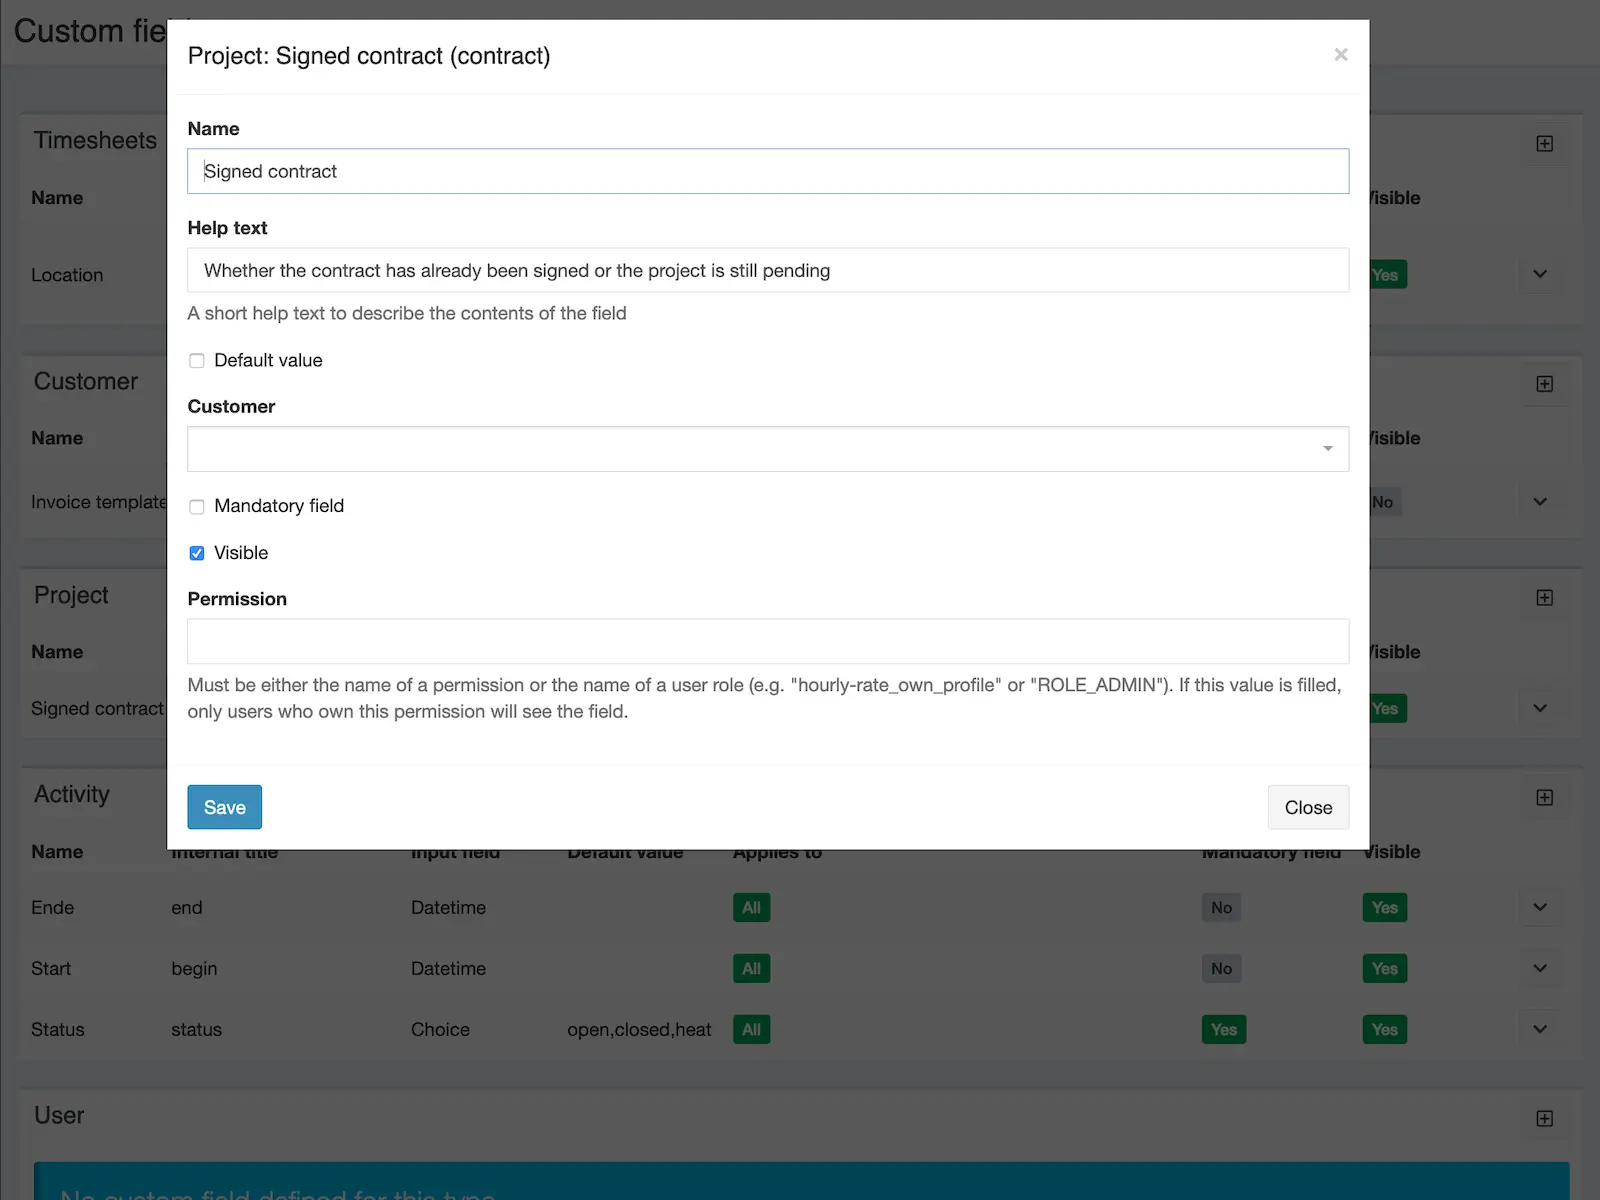
- is either optional or mandatory
- can be restricted to users with certain permissions or roles
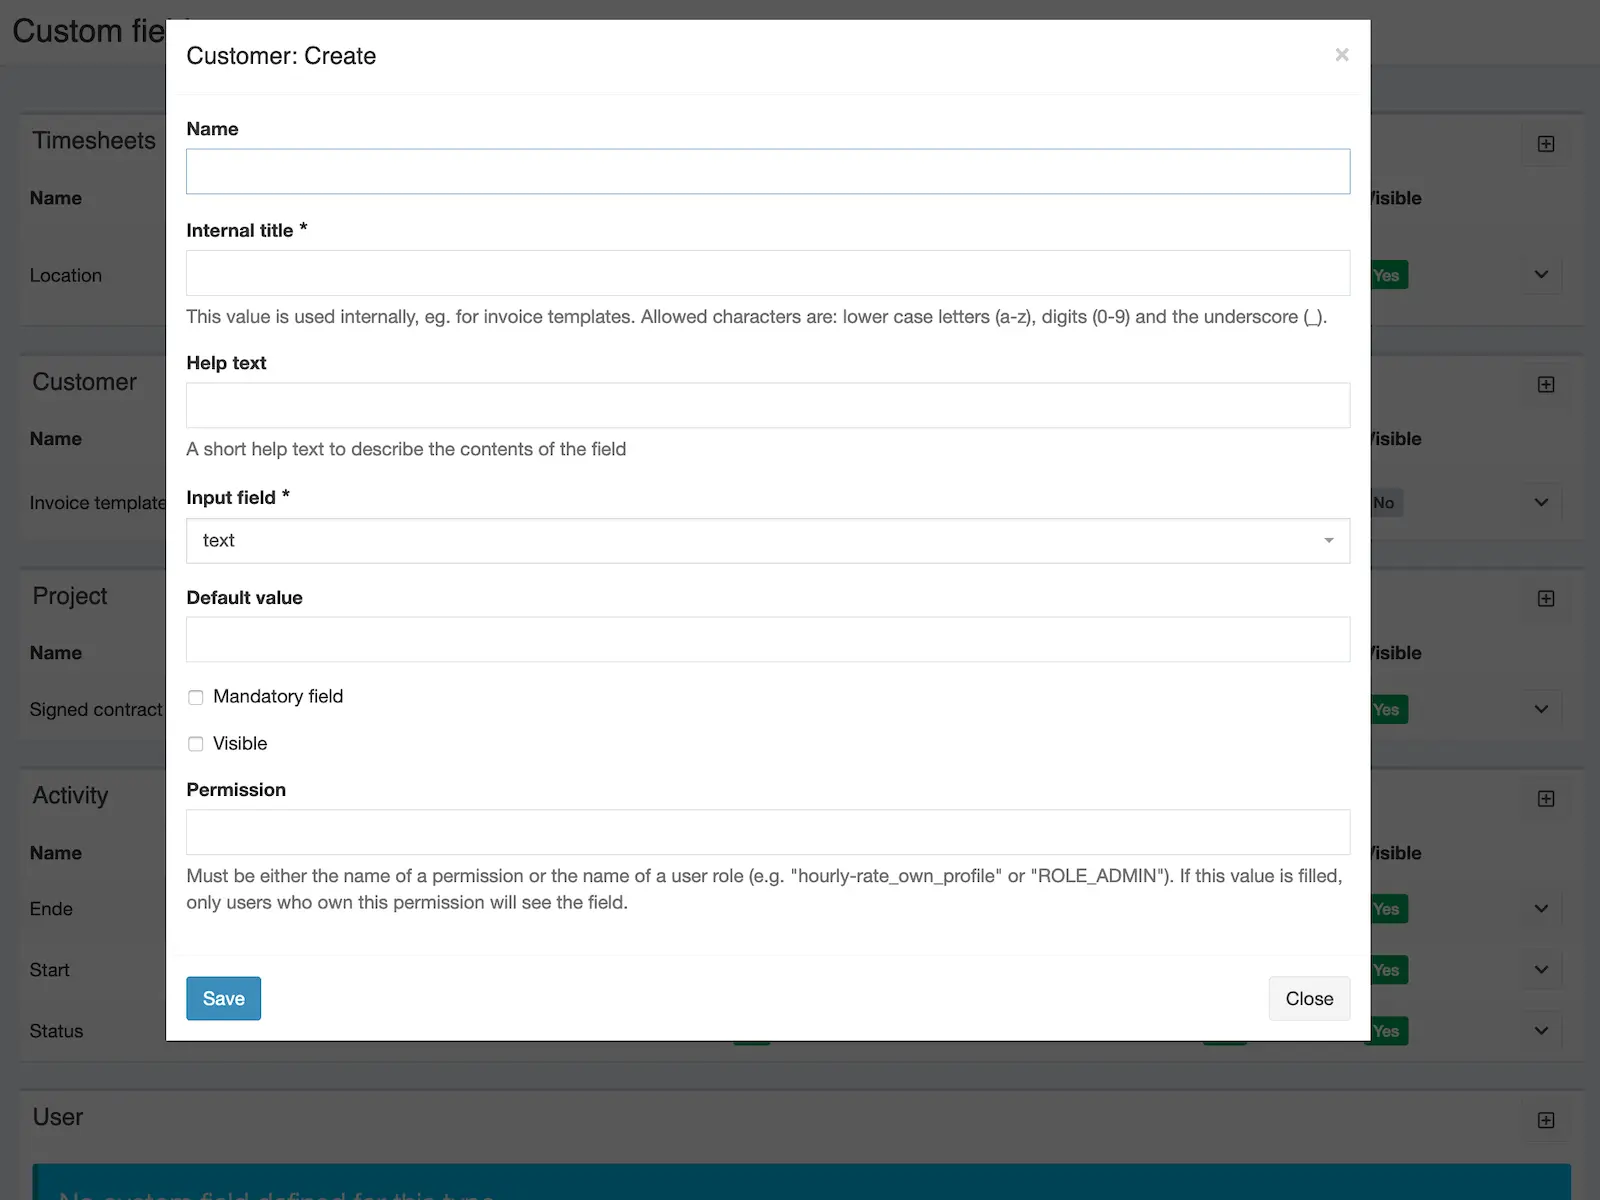
- can be described with a name and help text
- has a maximum length of 65535 character
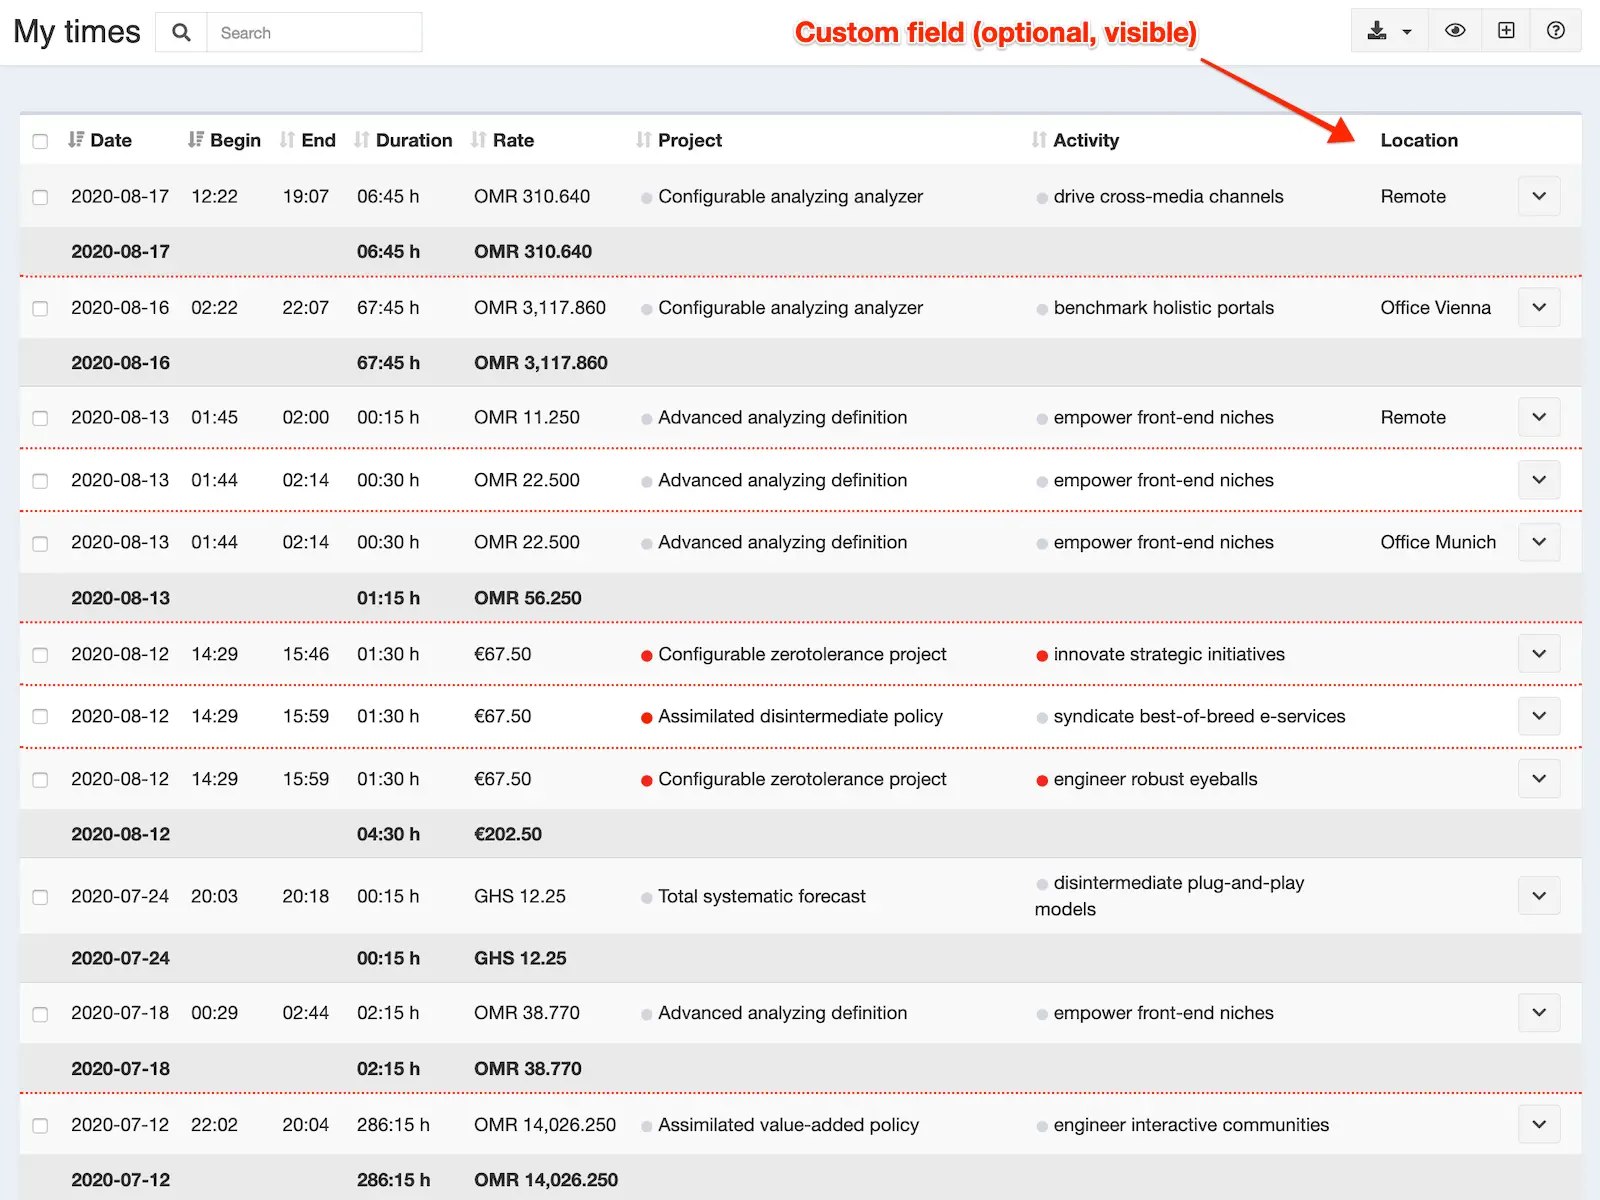
The custom-field data is then available in:
- Data-tables will display all visible fields
- Exports (HTML and Spreadsheets include all visible fields)
- Timesheet exports (include visible timesheet fields)
- API (collections and entities)
- Invoice templates (custom templates have access to all fields)
The ` Weekly hours` screen has a dedicated set of custom-fields for timesheets.
You can change the “weight” of custom-fields, so they show up in the order you define.
Be aware:
- Sensitive data can be configured as “invisible”, so it will not show up in the previously mentioned places
- User preferences (custom fields for users) are not exported by the API (this is a limitation in the core application)
- User preferences have a maximum length of 250 character
Field types
Custom fields can be of the following type:
string, integer, number, duration, money, language, currency, country, color, date, datetime, email, textarea, invoice template, checkbox, choice-list
More about those in the documentation.
Installation
Dateien kopieren
Extract the ZIP file and upload the included directory and all files to your Kimai installation to the new directory:
var/plugins/MetaFieldsBundle/The file structure needs to look like this afterwards:
var/plugins/
├── MetaFieldsBundle
│   ├── MetaFieldsBundle.php
|   └ ... more files and directories follow here ...
Cache leeren
After uploading the files, Kimai needs to know about the new plugin. It will be found once the cache was re-built. Call these commands from the Kimai directory:
How to reload Kimai cache
bin/console kimai:reload --env=prod
It is not advised, but in case the above command fails you could try:
rm -r var/cache/prod/*
You might have to set file permissions afterwards:
Adjust file permission
You have to allow PHP (your webserver process) to write to var/ and it subdirectories.
Here is an example for Debian/Ubuntu, to be executed inside the Kimai directory:
chown -R :www-data .
chmod -R g+r .
chmod -R g+rw var/
You might not need these commands in a shared-hosting environment.
And you probably need to prefix them with sudo and/or the group might be called different from www-data.
Datenbank erstellen
Run the following command:
bin/console kimai:bundle:metafields:installThis will create the required database tables and update them to the latest version.
If you see an error like There are no commands defined in the "kimai:bundle:XYZ" namespace.,
then either the directory has a wrong name (must be var/plugins/MetaFieldsBundle/) or you forgot to clear the cache (look above).
Aktualisierung
Updating the plugin works exactly like the installation:
- Delete the directory
var/plugins/MetaFieldsBundle/ -
Execute all installation steps again:
- Dateien kopieren
- Cache leeren
- Update database with
bin/console kimai:bundle:metafields:install
Änderungen
Version 2.12.0
Compatibility: requires minimum Kimai 2.34.0
- Improve API docs
Version 2.11.0
Compatibility: requires minimum Kimai 2.34.0
- Support meta-fields for the
Weekly hoursscreen
Version 2.10.0
Compatibility: requires minimum Kimai 2.25.0
- Fix default value for boolean values of user-preferences
- Use translations from Kimai core
- Rename migration config for compatibility with new plugin installer
- Code improvement: PHPStan 2 with strict and deprecation rules activated
Version 2.9.0
Compatibility: requires minimum Kimai 2.15.0
- Inline Nelmio API Doc configuration
Version 2.8.0
Compatibility: requires minimum Kimai 2.15.0
Version 2.7.0
Compatibility: requires minimum Kimai 2.15.0
- Improved internal API
- Fixed translation issues with Task fields
Version 2.6.0
Compatibility: requires minimum Kimai 2.15.0
Added: support for custom fields with the Task-Management bundle (needs Task Management version 2.7.0)
Version 2.5.0
Compatibility: requires minimum Kimai 2.5.0
Fixed: auto-tags support in detail pages (in cases where many tags already exist)
Version 2.4.1
Compatibility: requires minimum Kimai 2.5.0
- Changed: import Route attribute from correct namespace
- Changed: removed API security definition
Version 2.4.0
Compatibility: requires minimum Kimai 2.5.0
Changed: do not load all meta-fields from database on every page load
Version 2.3.0
Compatibility: requires minimum Kimai 2.5.0
Changed: moved some translations to core, allowing more languages
Version 2.2.0
Compatibility: requires minimum Kimai 2.1.0
Use annotation type for routes
Version 2.1.0
Compatibility: requires minimum Kimai 2.0.0
Simplified listing view
Version 2.0.7
Compatibility: requires minimum Kimai 2.0.0
Fixed: prevent error if tag name exceeds 100 character
Bilder
FAQ
Die FAQs werden vom Entwickler des Angebots bereitgestellt.
All paid plugins are annual subscriptions. Read more about the exact license details here.
You can buy the plugin via the Marketplace LemonSqueezy and pay with Credit Card or PayPal for immediate access. You can also get in touch and pay with wire transfer or SEPA, but you will have to wait a few days before getting access to the plugin.
Basic support is included and I am happy to help occasionally with simple issues. Larger support-questions, bug-reports and feature-requests will be answered in this Github repository. Customers who bought a plugin including support can write to support@kimai.org.
If you purchase a plugin subscription, you’ll receive all updates, bugfixes, and support for one year. After the subscription ends, your plugin will continue to work without any restrictions – you can keep using the last version you downloaded. This model is known as a perpetual fallback license. However, access to future updates, new features, and compatibility fixes require an active subscription.
No, refunds are not available. Kimai plugins are delivered as digital downloads and cannot be returned once the source code has been accessed. Additionally, payment providers charge non-refundable transaction fees, even if a refund were issued. For these reasons, all sales are final. The same applies for subscriptions that were not canceled in time. Please try the demo versions or contact us before purchase if you’re unsure whether a plugin fits your needs.