自定义内容
创建自定义内容:样式表、javascript、全局警告消息和新页面,以呈现公司新闻的降价内容。

Kevin Papst
A Kimai plugin which allows adding custom content for:
- Stylesheet (embedded in all pages)
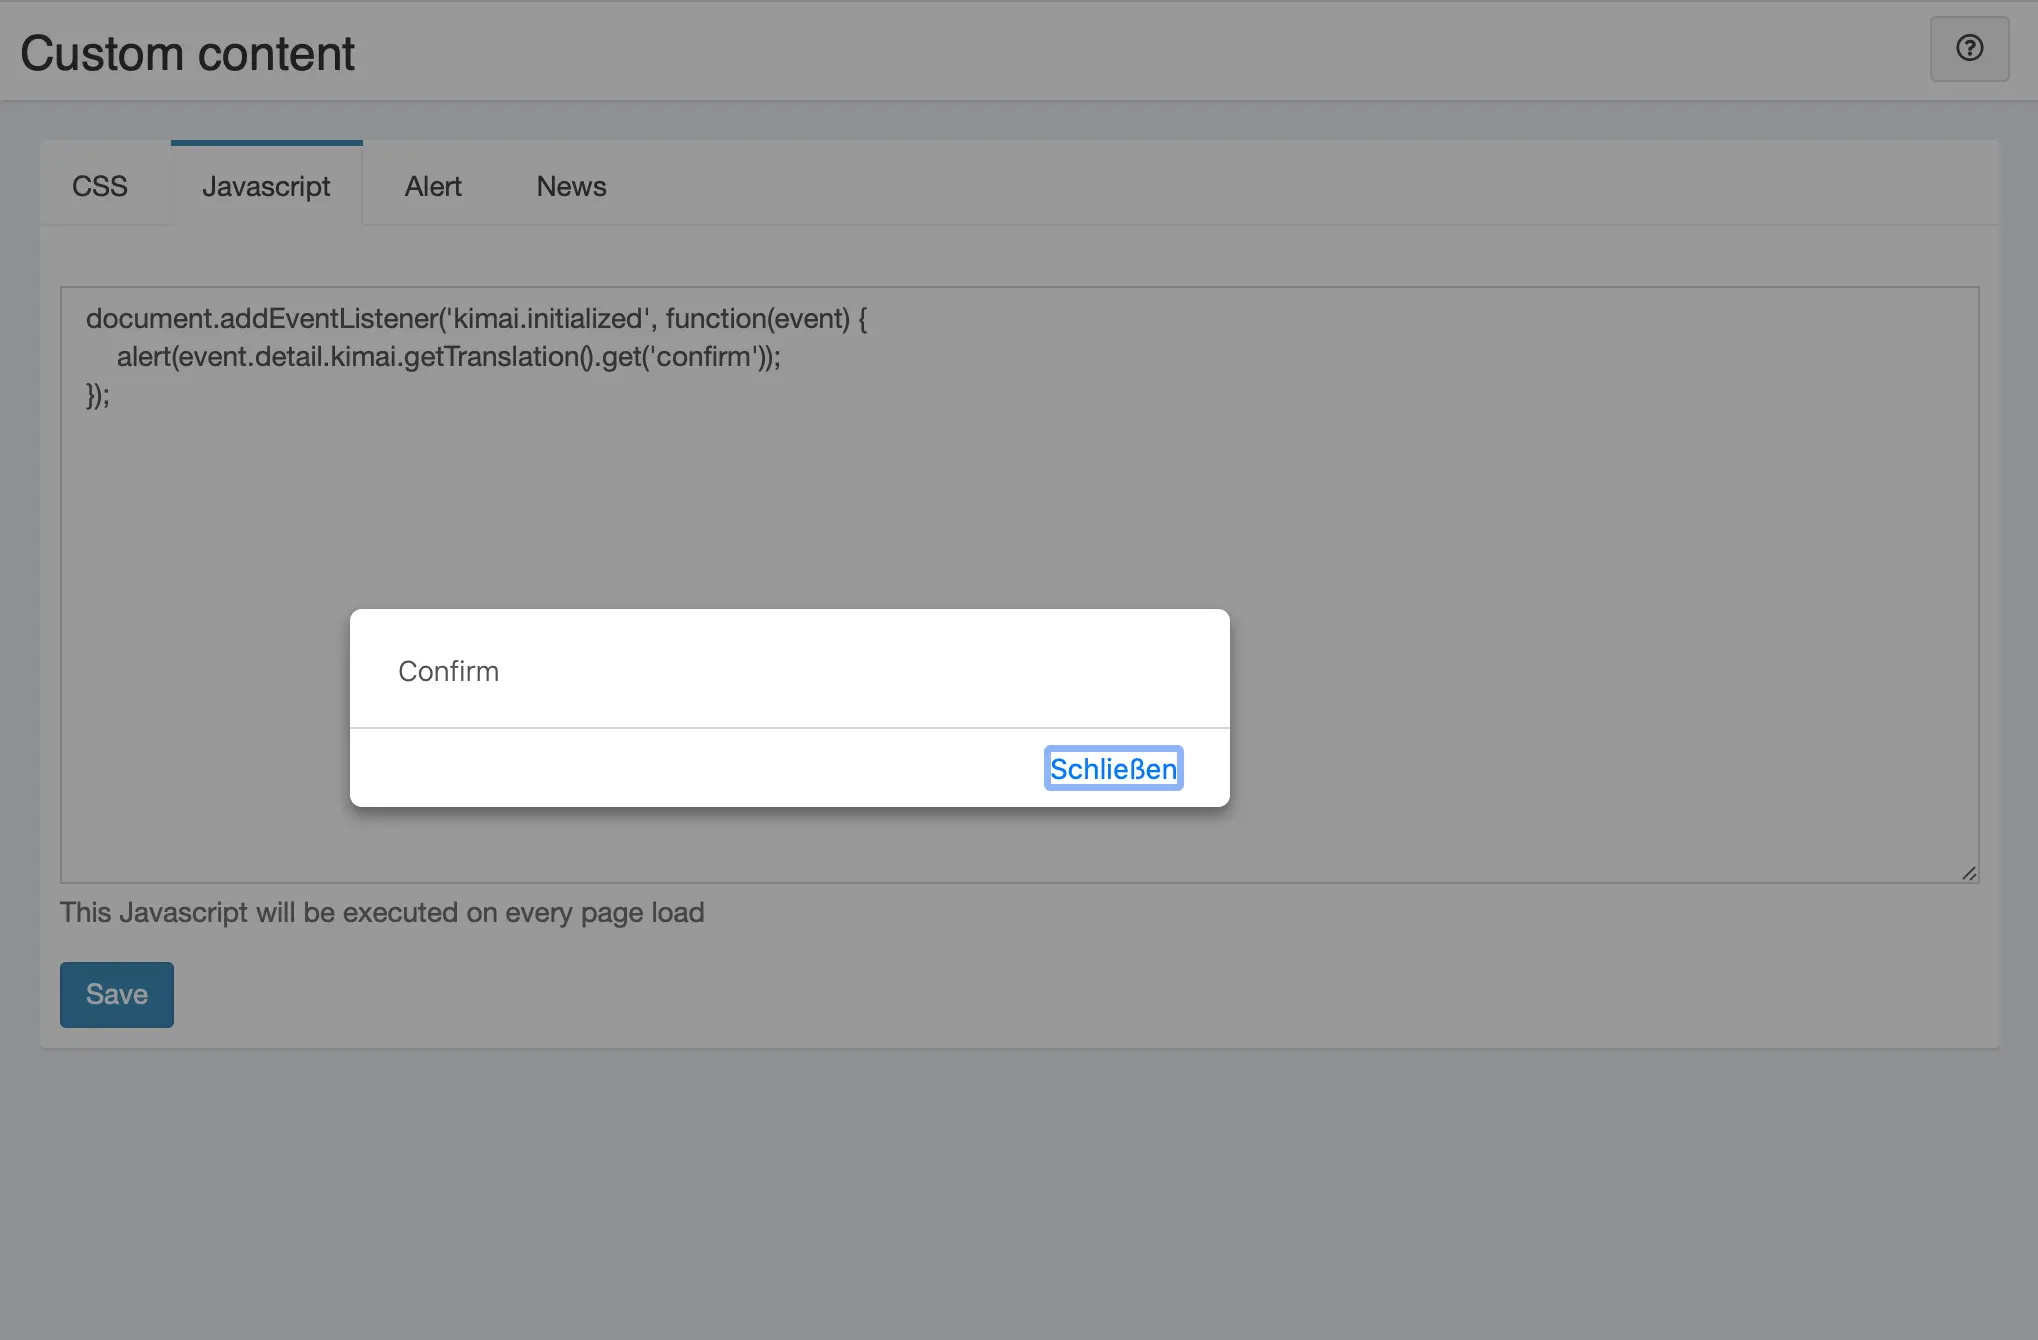
- Javascript (embedded in all pages, except security screens)
- A global warning message, shown to every logged-in user
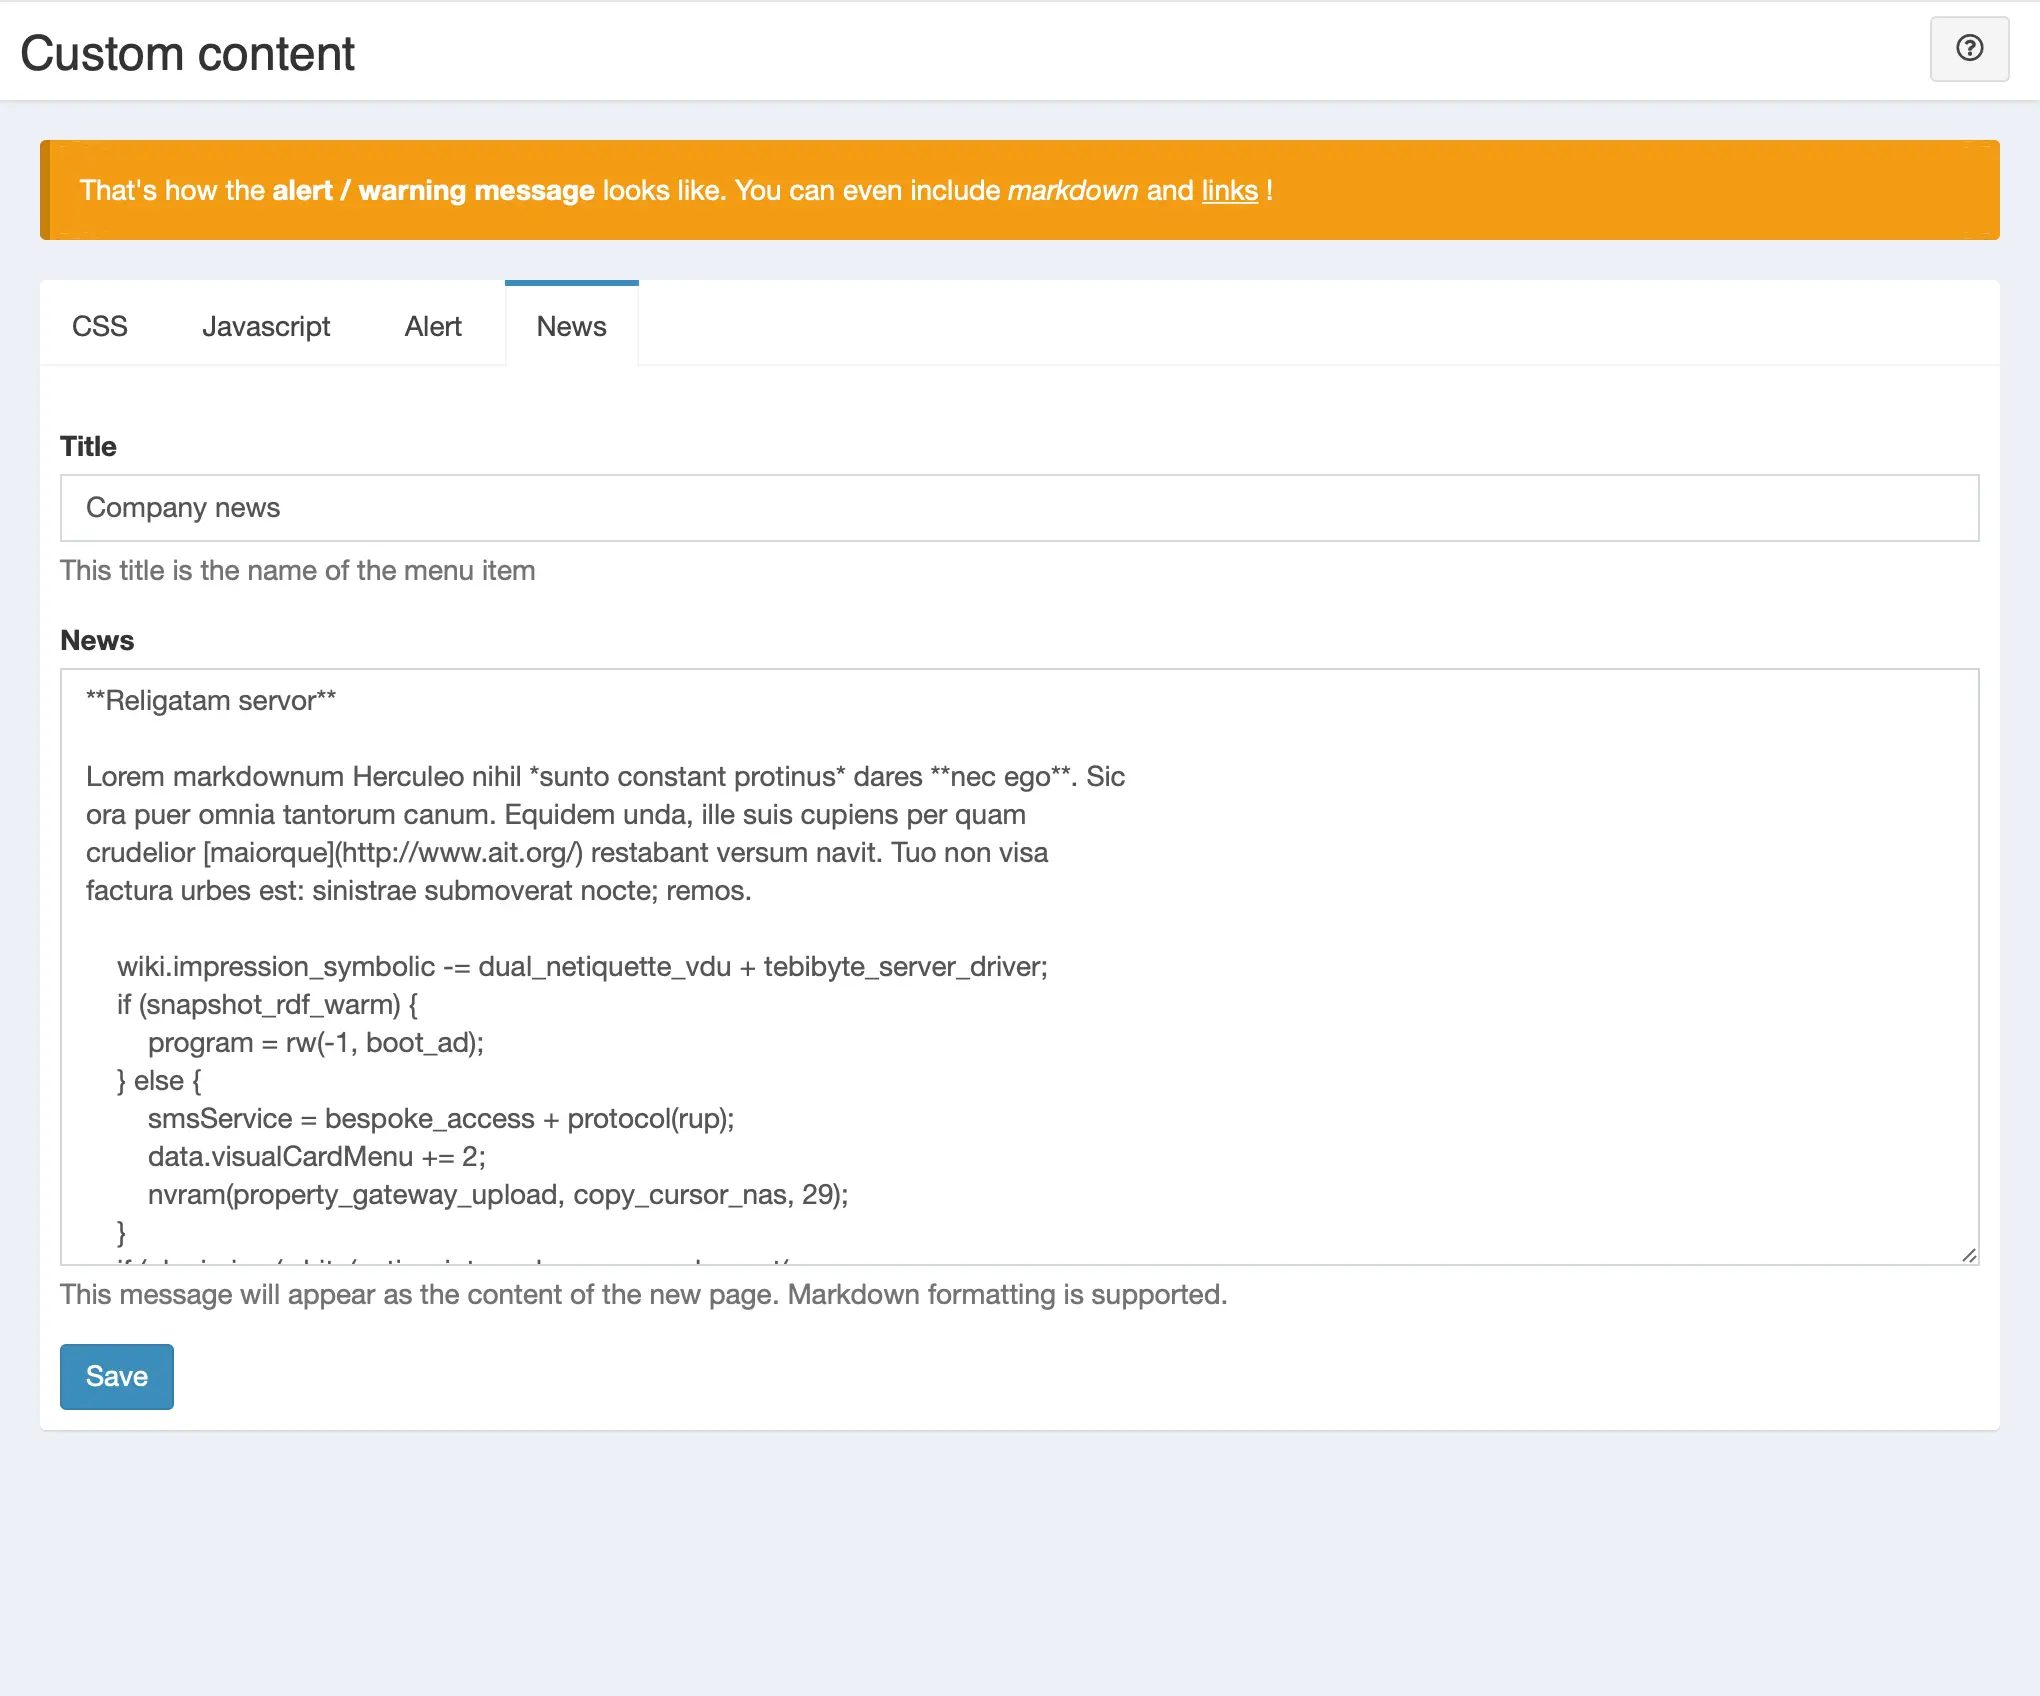
- An entire new page to display (markdown formatted) information for your users
Alternative
If you only want to add some custom CSS stylesheets, you can have a look at this free item instead: 自定义 CSS
Storage
This bundle stores contents in the directory var/data/custom-content-bundle/.
Make sure the data directory is writable by your webserver and included in your backups.
安装
复制文件
Extract the ZIP file and upload the included directory and all files to your Kimai installation to the new directory:
var/plugins/CustomContentBundle/The file structure needs to look like this afterwards:
var/plugins/
├── CustomContentBundle
│   ├── CustomContentBundle.php
|   └ ... more files and directories follow here ...
清除缓存
After uploading the files, Kimai needs to know about the new plugin. It will be found once the cache was re-built. Call these commands from the Kimai directory:
How to reload Kimai cache
bin/console kimai:reload --env=prod
It is not advised, but in case the above command fails you could try:
rm -r var/cache/prod/*
You might have to set file permissions afterwards:
Adjust file permission
You have to allow PHP (your webserver process) to write to var/ and it subdirectories.
Here is an example for Debian/Ubuntu, to be executed inside the Kimai directory:
chown -R :www-data .
chmod -R g+r .
chmod -R g+rw var/
You might not need these commands in a shared-hosting environment.
And you probably need to prefix them with sudo and/or the group might be called different from www-data.
更新
Updating the plugin works exactly like the installation:
- Delete the directory
var/plugins/CustomContentBundle/ -
Execute all installation steps again:
- 复制文件
- 清除缓存
变更记录
Version 2.5.0
Compatibility: requires minimum Kimai 2.5.0
- Do not remove line breaks in CSS and Javascript to support inline comments
Version 2.4.0
Compatibility: requires minimum Kimai 2.5.0
Internal: PHPStan 2 with strict and deprecation rules
Version 2.3.2
Compatibility: requires minimum Kimai 2.5.0
- Refactoring: do not register Entity directory as service
Version 2.3.1
Compatibility: requires minimum Kimai 2.5.0
- Changed: import Route attribute from correct namespace
- Changed: use bundle identifier to load routes
Version 2.3.0
Compatibility: requires minimum Kimai 2.5.0
Changed: moved some translations to core, allowing more languages
Version 2.2.0
Compatibility: requires minimum Kimai 2.1.0
- Fixed: route mapping type changed to attribute
- Fixed code-sniffer deprecation
Version 2.1.1
Compatibility: requires minimum Kimai 2.0.0
Added: explicit ID and class to target markdown news content via Javascript
Version 2.1.0
Compatibility: requires minimum Kimai 2.0.0
Added: new permissions - js_custom_content, css_custom_content, alert_custom_content, news_custom_content Added: better tabs
截图


FAQ
These FAQs are provided by the developer of this offer.
All paid plugins are annual subscriptions. Read more about the exact license details here.
You can buy the plugin via the Marketplace LemonSqueezy and pay with Credit Card or PayPal for immediate access. You can also get in touch and pay with wire transfer or SEPA, but you will have to wait a few days before getting access to the plugin.
Basic support is included and I am happy to help occasionally with simple issues. Larger support-questions, bug-reports and feature-requests will be answered in this Github repository. Customers who bought a plugin including support can write to support@kimai.org.
If you purchase a plugin subscription, you’ll receive all updates, bugfixes, and support for one year. After the subscription ends, your plugin will continue to work without any restrictions – you can keep using the last version you downloaded. This model is known as a perpetual fallback license. However, access to future updates, new features, and compatibility fixes require an active subscription.
No, refunds are not available. Kimai plugins are delivered as digital downloads and cannot be returned once the source code has been accessed. Additionally, payment providers charge non-refundable transaction fees, even if a refund were issued. For these reasons, all sales are final. The same applies for subscriptions that were not canceled in time. Please try the demo versions or contact us before purchase if you’re unsure whether a plugin fits your needs.
