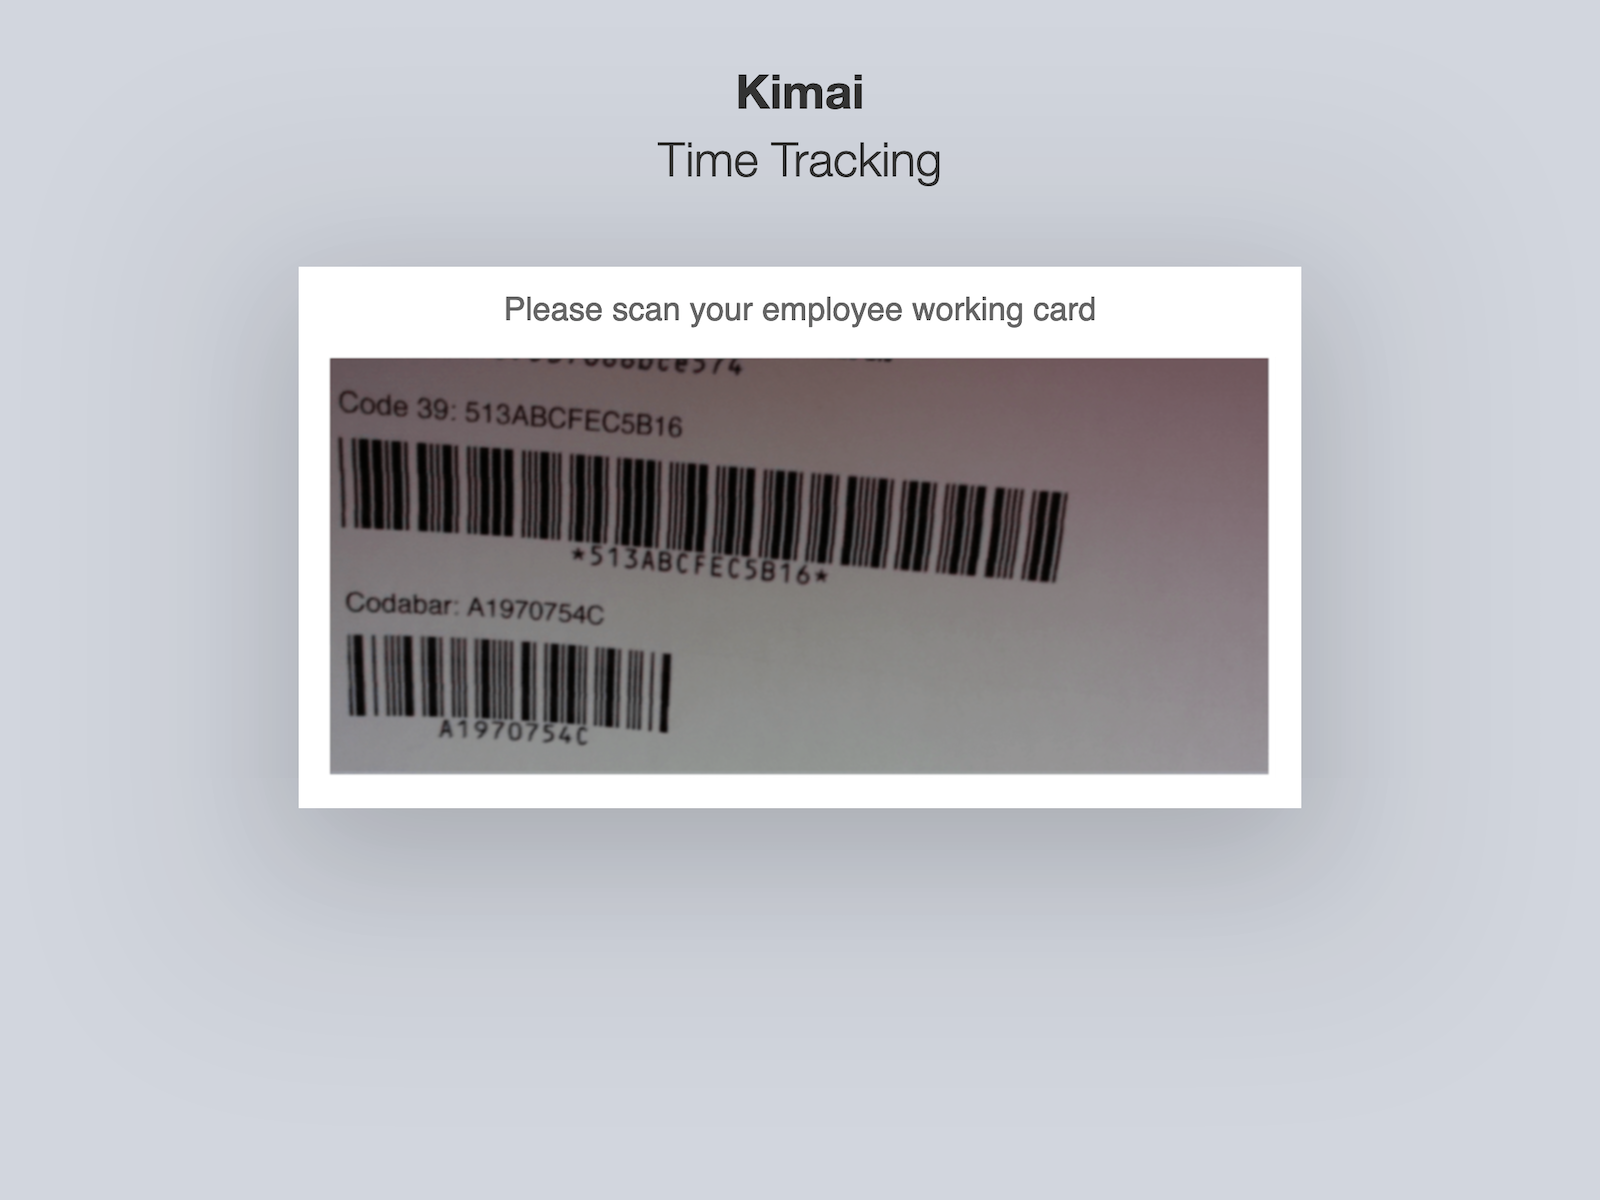
מצב קיוסק עם תמיכה בברקוד, ב־RFID וב־Web NFC
מעקב נוכחות בסביבה בה למשתמש אין גישה ל־Kimai (למשל במחסן) על ידי שימוש בברקוד או בסורק RFID כדי להתחיל או לעצור דיווח שעות.

Kevin Papst
A Kimai plugin, which allows using barcodes for punch-in and punch-out time tracking with Kimai.
You can use it with a barcode scanner, with a web-camera, with a RFID reader or an NFC reader.
It also supports a “freestyle” mode, which allows to enter any free configurable code (up to 120 characters), so you can also use other devices for starting/stopping:
- an electronic USB number-pad
- an RFID scanner that acts as keyboard
- an Android device with Web NFC support (only Chrome browser)
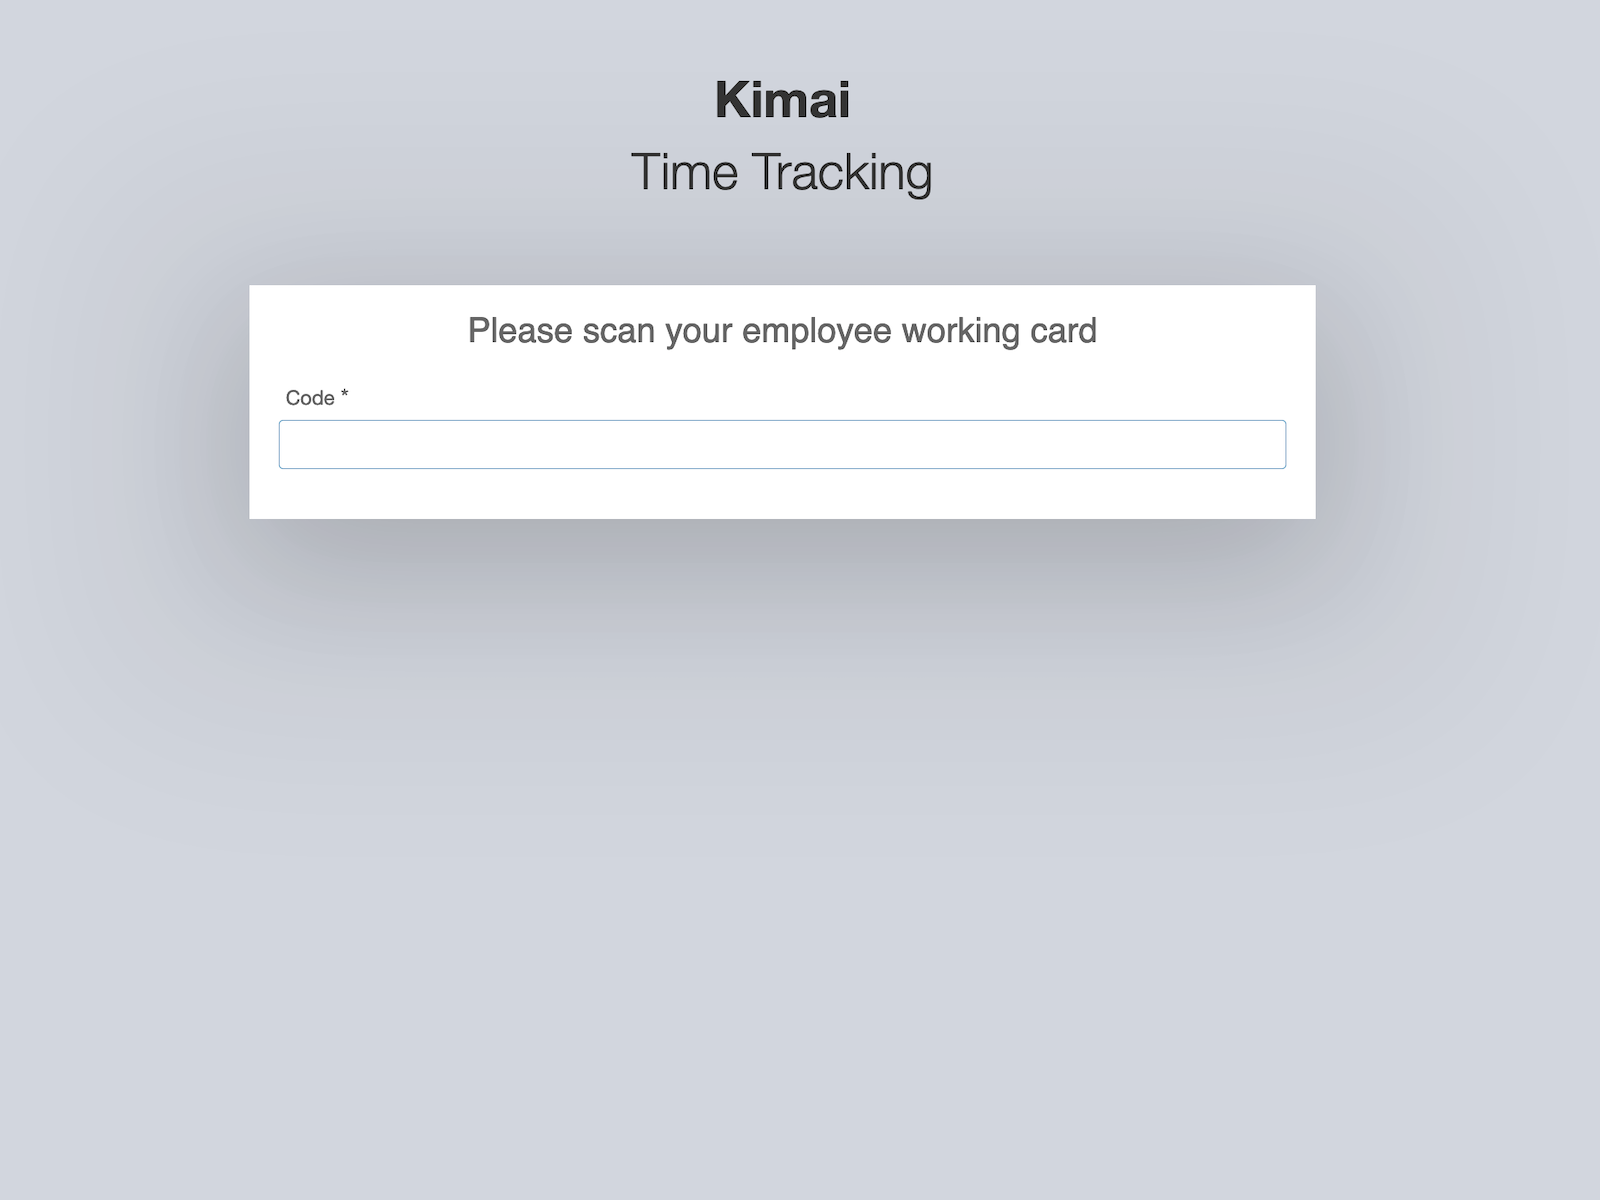
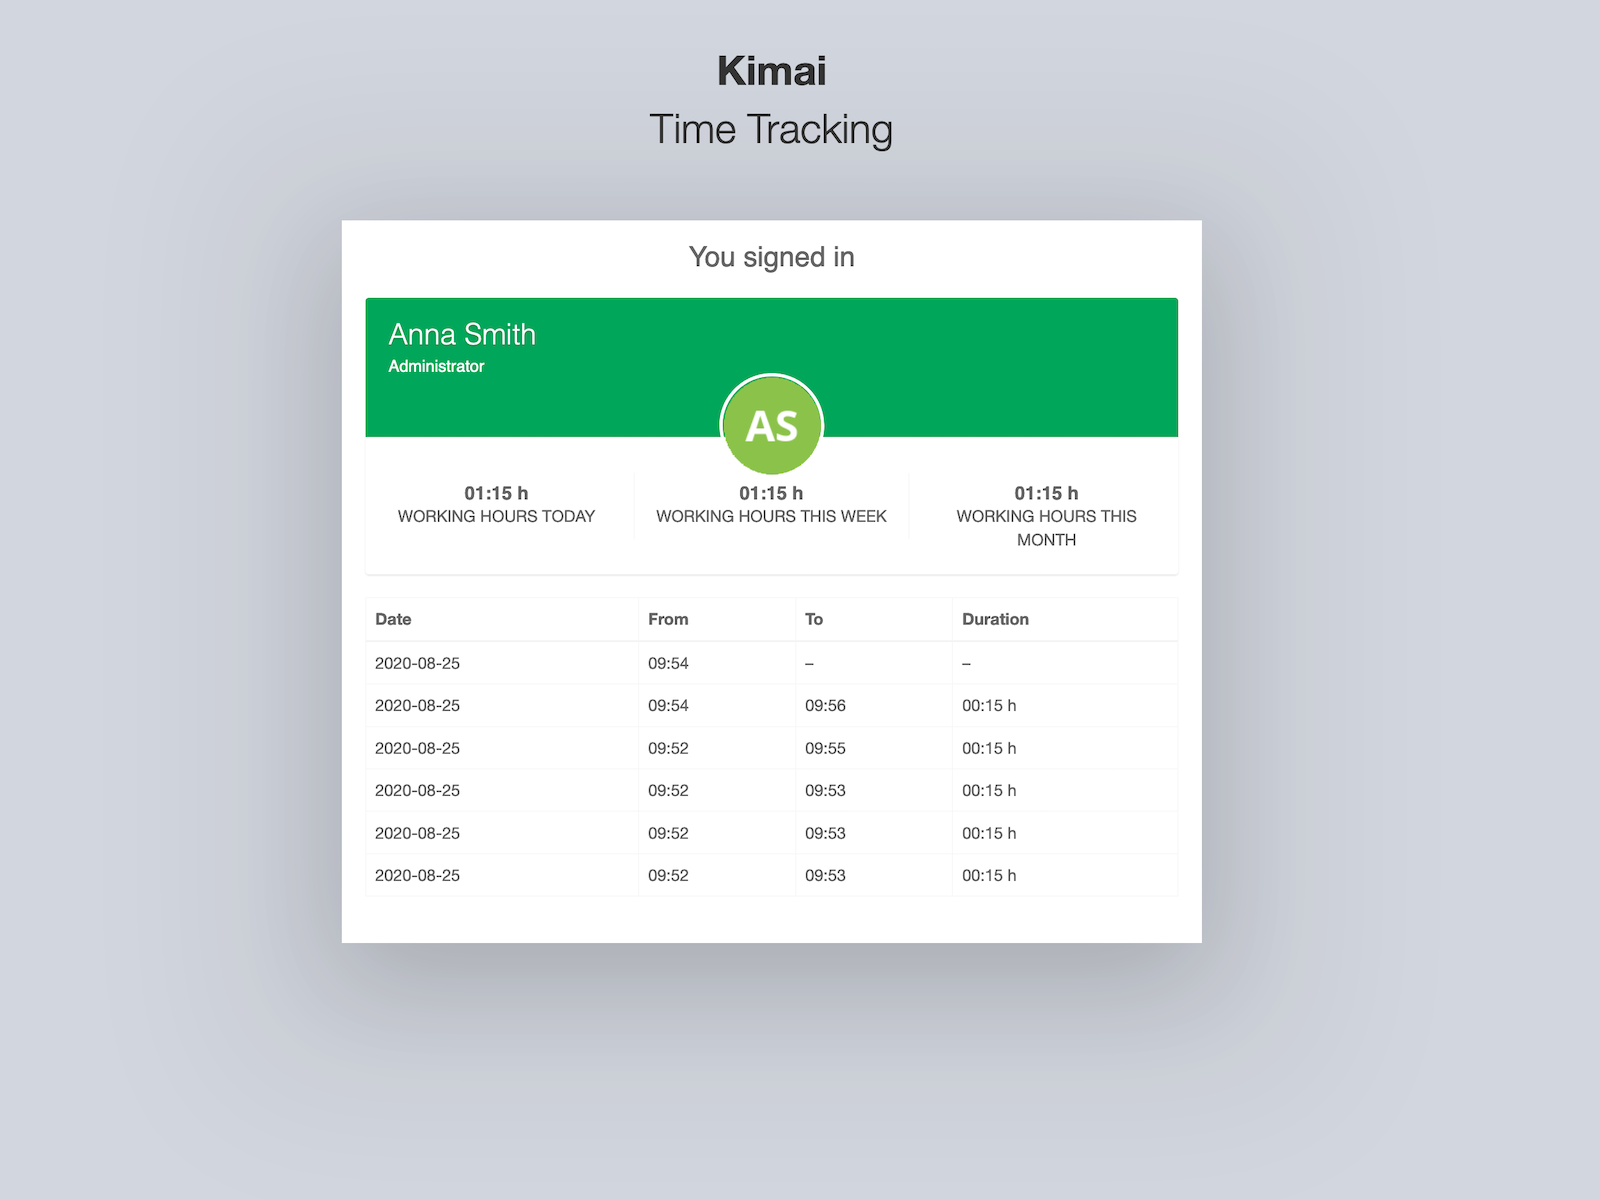
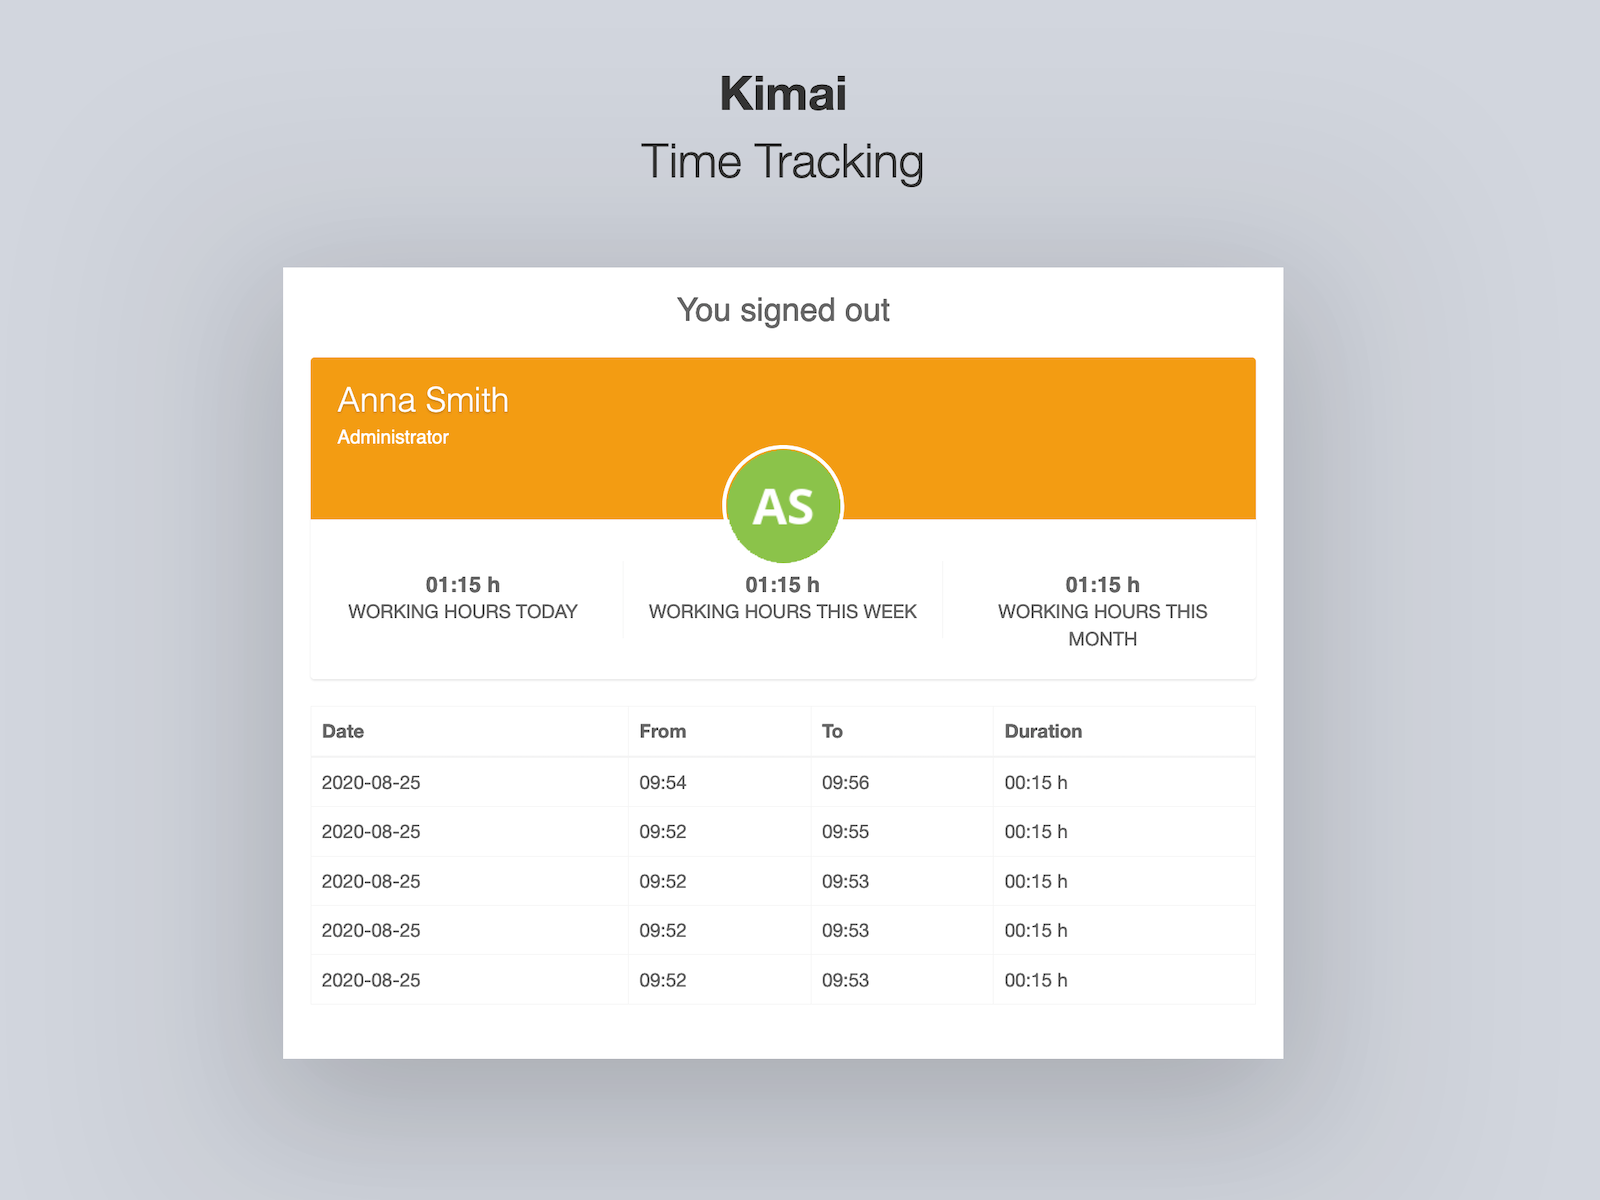
This bundle is the solution for you, if you want to use Kimai in a kiosk mode, where users register their attendance time through punch-in (coming) and punch-out (leaving) mode.
It could be as simple as:
- Hand out NFC or RFID tokens to your employees
- Mount a tablet to the wall in your entrance room
- Let your users check-in & check-out when entering the building by scanning their tokens
You can test it in the “Plugins” demo.
Features
- Start/Stop work with
- Barcode scanner (via device camera, only works via HTTPS)
- Barcode scanner (via USB or Bluetooth)
- RFID scanner (via USB or Bluetooth)
- Web NFC
- Upon starting/stopping a record via this plugin, the user will see a short overview screen with the entries of the current week (including some statistics)
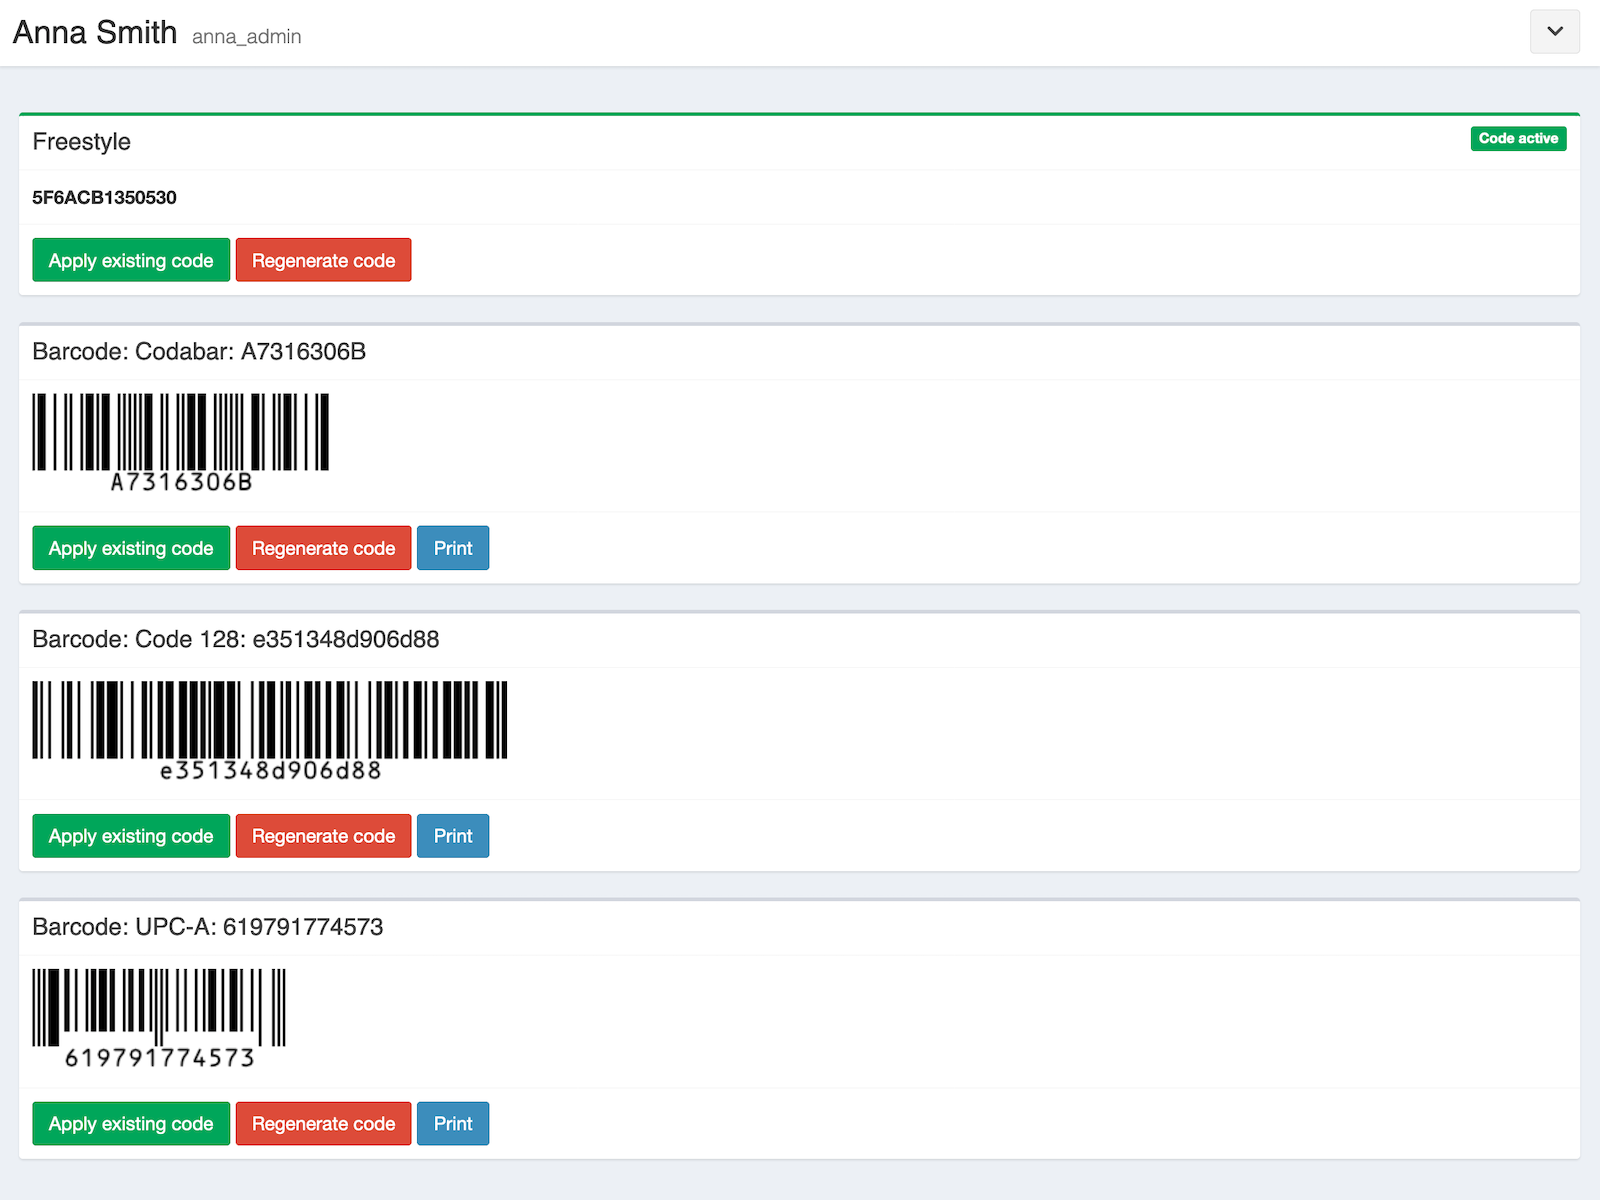
- New user profile screen for the “codes”
- Display all codes for user
- Generate a random code (automatically done if none is existing yet for the active code-type)
- Re-use existing code for user by entering (or scanning) it manually
- User specific settings to configured allowed start and end working time (user can only clock in between these times)
- Supports the following 1D barcodes:
Code 128Code 39-
UPC-A(scanner needs to transmit check digit) Code 2 of 5Code 2 of 5 interleaved-
Codabar(scanner needs to transmit start & stop digits)
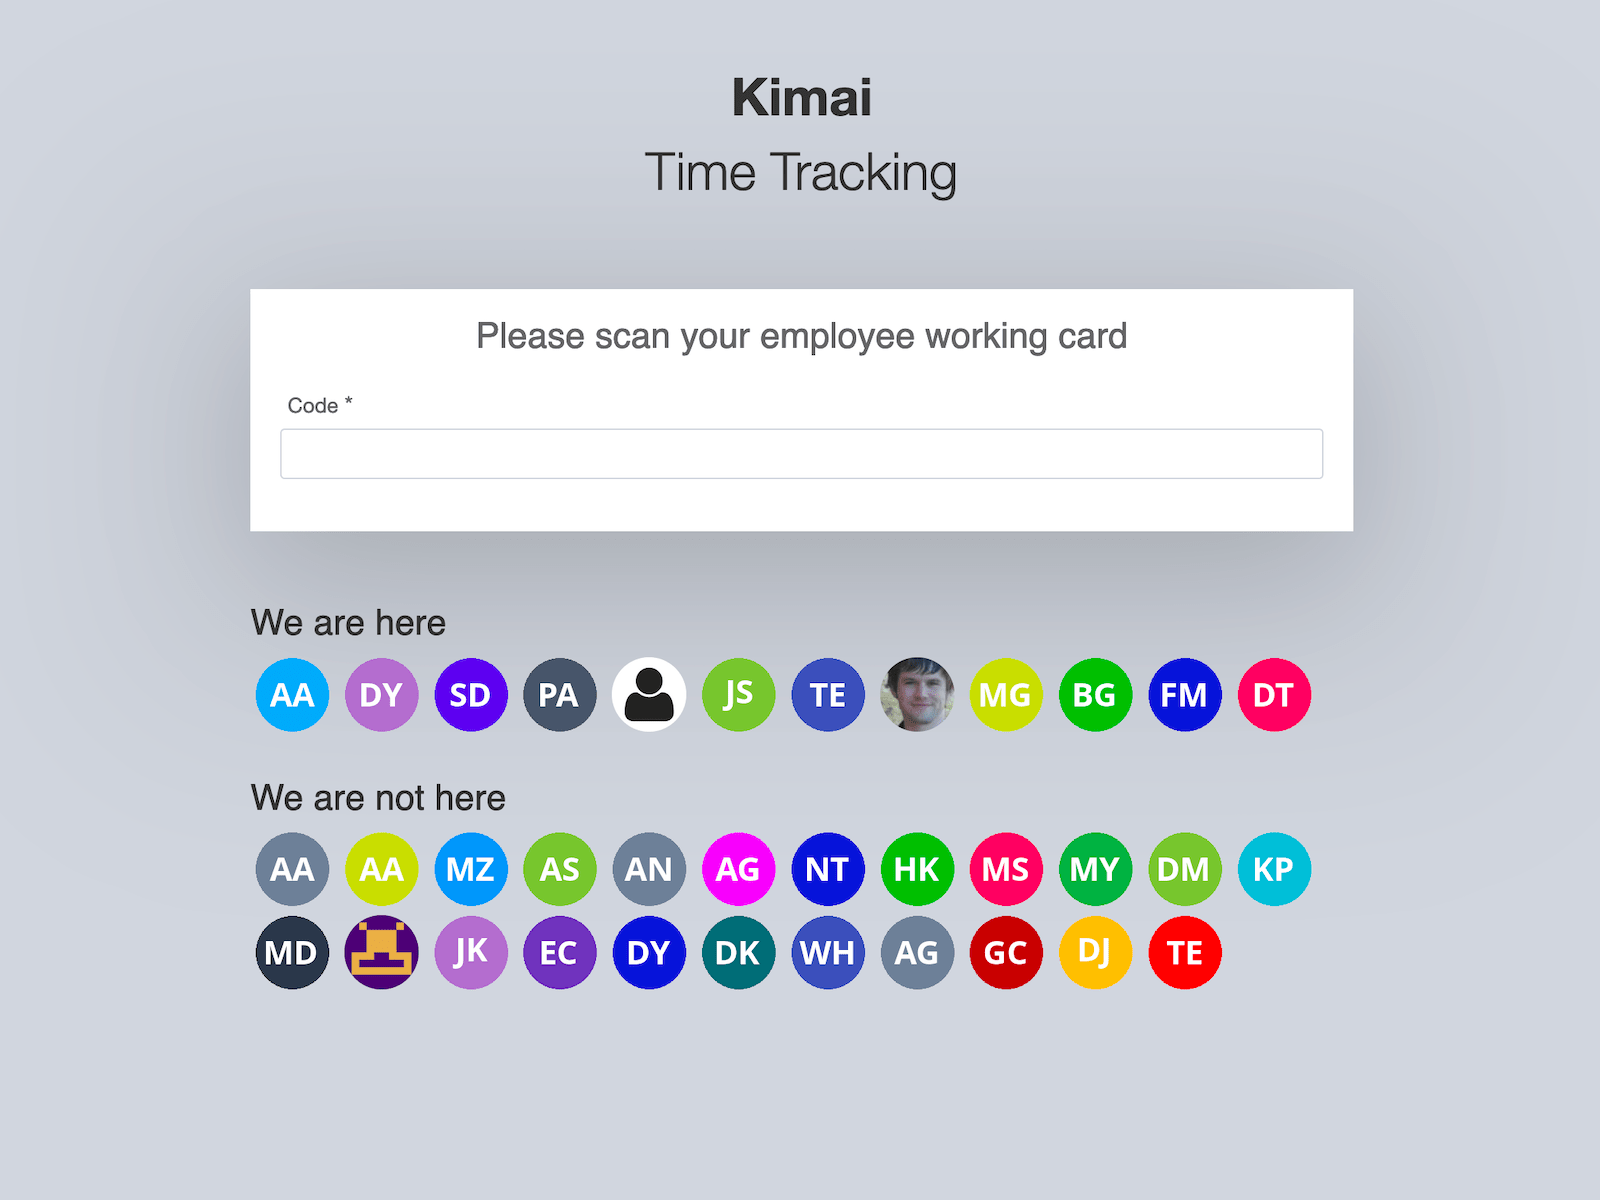
- Optional: show active / inactive users in login screen
- Many CSS classes to customize the look with Custom CSS Bundle
You need to configure a non-global activity for starting the record via this plugin. This will be used for every recorded timesheet that is created using the kiosk mode.
Hardware
This is NOT a hardware recommendation, but more an idea for possible use-cases.
I tried the linked products and even though all scanner are rather cheap, they work without problems.
- Raspberry PI setup with touch screen (eg. for wall mount)
- RFID scanner by Neuftech (desktop version)
- RFID scanner by KKMoon (desktop version)
- Barcode scanner which can also scan codes from mobile phones (desktop version)
- Barcode scanner classic hand-held version
The above are affiliate links for Amazon (germany) where I bought them myself.
Configuration
You have to configure the bundle before you can use it - you reach the configuration via
- the
Pluginscreen (Preferencesin action dropdown behind the plugin) - the Kiosk administration (cogs icon in the upper right)
- the System configuration (
Kiosk & Barcodesection)
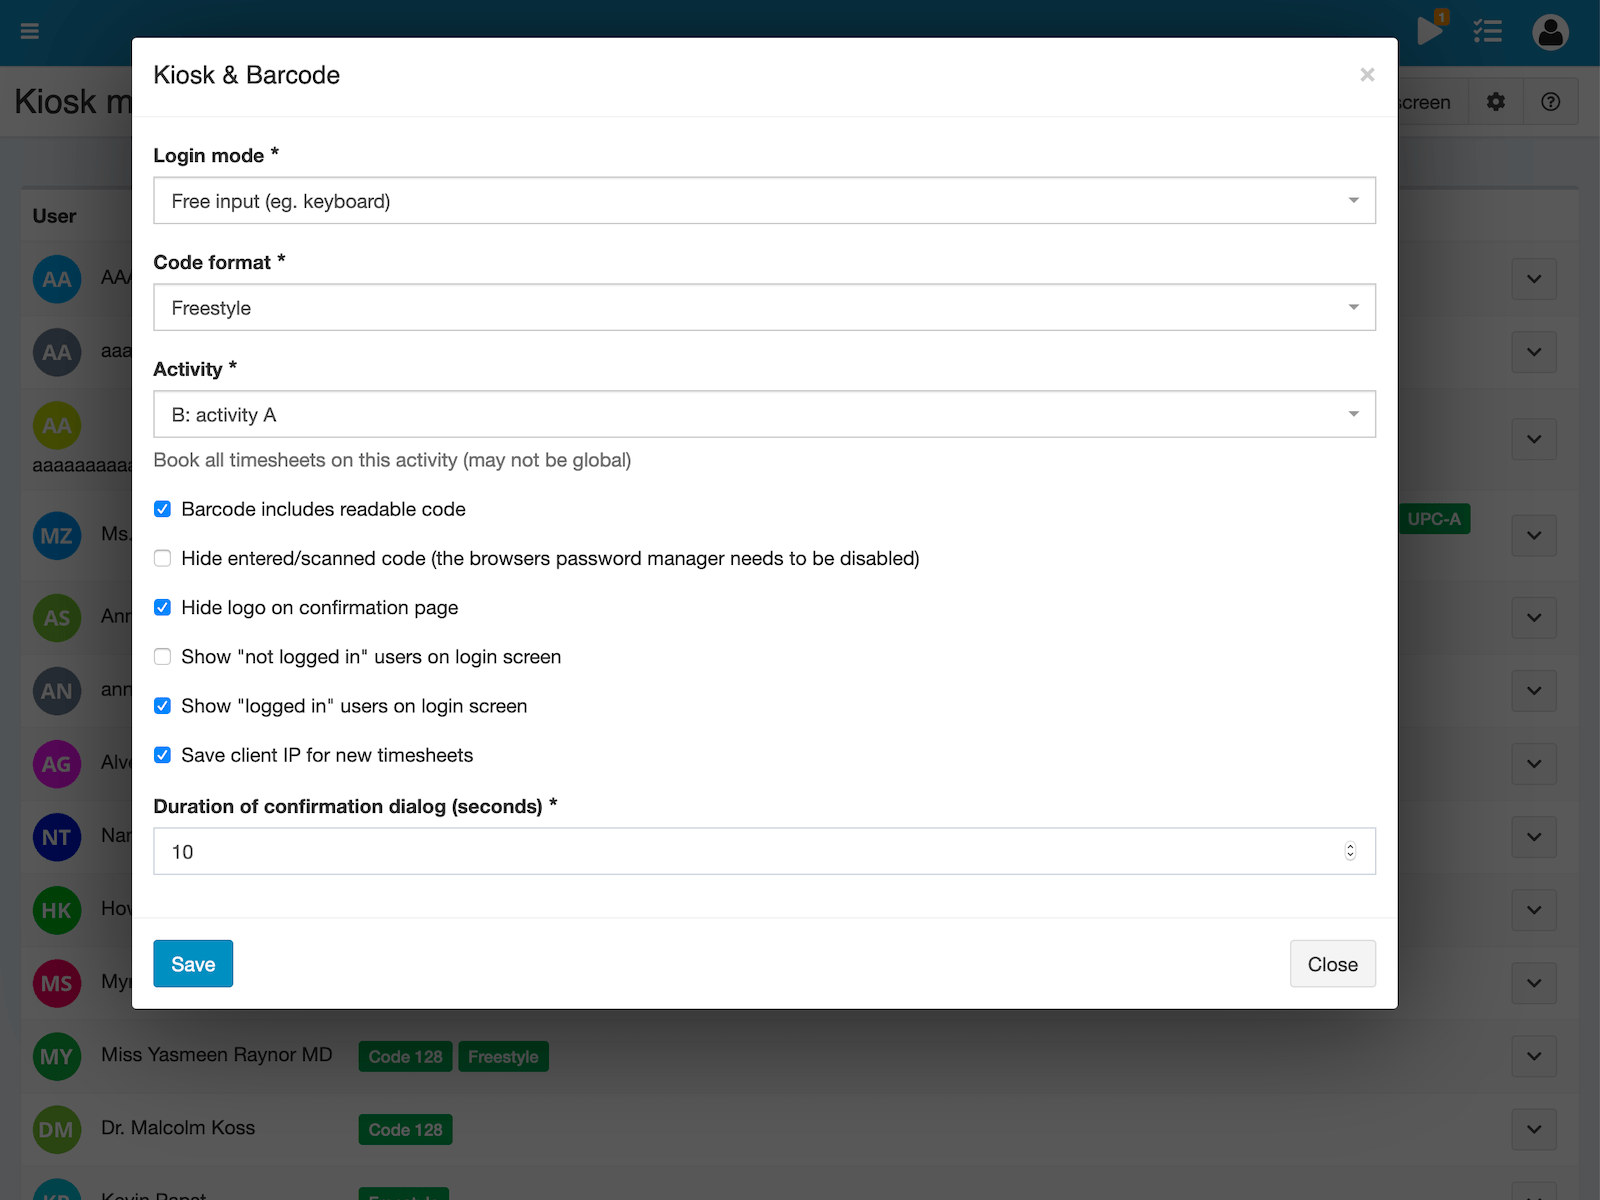
The following configurations are available:
| Configuration | Description |
|---|---|
Login mode |
whether to use camera or usb mode |
Code format |
you have to decide which code format you want to use |
Barcode includes readable code |
whether the barcode in the user profile will include the human readable code |
Duration to display confirmation dialog (in seconds) |
how long the start/stop screens will be shown after a successful scan |
Activity |
the non-global activity that will be used to track the times |
Permissions
This bundle introduces new permissions, which limit access to certain functions:
| Permission Name | Description |
|---|---|
kiosk_admin |
whether the current user can see the Kiosk administration and assign codes |
kiosk_own_profile |
configure codes and user specific kiosk settings (eg. start and end time) for own account |
kiosk_other_profile |
configure codes and user specific kiosk settings (eg. start and end time) for other accounts |
By default, these are granted to each user with the role ROLE_SUPER_ADMIN.
Licenses
The following libraries are used and shipped with this plugin:
- Barcode scanning: https://github.com/ericblade/quagga2 (Version: 0.0.18, License: MIT)
- Barcode generation: https://github.com/metafloor/bwip-js (Version: 2.0.6, License: MIT)
Changelog
## Version 2.8.0

Compatibility: requires minimum Kimai 2.11.0

- Added: system configuration `kiosk.enabled` to disable Kiosk via local.yaml
- Added: allow to set NFC code in edit screen via WebNFC
- Changed: support attribute caching in Voter
- Changed: simplified buttons in users kiosk profile

## Version 2.7.0

Compatibility: requires minimum Kimai 2.11.0

- Added: show kiosk codes as user profile tab
- Added: print barcode on click to the image
- Changed: removed `barcode_own_profile` and `barcode_other_profile` permissions, replaced by `kiosk_own_profile` and `kiosk_other_profile`

## Version 2.6.0

Compatibility: requires minimum Kimai 2.11.0

- Changed: CSS files and language handling, required for Kimai 2.11.0
- Changed: Replaced deprecated RestRoute attribute with SF native one

## Version 2.5.0

Compatibility: requires minimum Kimai 2.1.0

- Use annotation type for routes

## Version 2.4.1

Compatibility: requires minimum Kimai 2.0.35

- Adjusted internal API usage to prevent calls to deprecated code

## Version 2.4.0

Compatibility: requires minimum Kimai 2.0.33

- Fixed: possible pagination issues

## Version 2.3.1

Compatibility: requires minimum Kimai 2.0.29

- Fixed: upgraded quagga from 0.0.18 to 1.8.2
- Fixed: upgraded bwip from 2.0.6 to 3.0.1

## Version 2.3.0

Compatibility: requires minimum Kimai 2.0.29

- Added: use language of the current user to render the welcome screen
- Added: use timezone of the current user to display the time

## Version 2.2.1

Compatibility: requires minimum Kimai 2.0.20

- Fixed: compatibility with Kimai 2.0.20 and Tabler Beta 19

## Version 2.2.0

Compatibility: requires minimum Kimai 2.0

- Added: Support for [Web NFC](https://developer.mozilla.org/en-US/docs/Web/API/NDEFReader) in freestyle mode
- Added: upgrade item actions to use v2 API

## Version 2.1.0

Compatibility: requires minimum Kimai 2.0

- Added: detect HTTP and include hint in error message, that webcam can only be accessed via HTTPS
- Added: Allow to manually select camera by user
- Added: Configuration if user may select the camera
- Added: Store used device ID in cookie
- Added: Configuration for input field placeholder
- Changed: Added and changed HTML IDs for better "Custom CSS" experience
- Fixed: disappearing error message

## Version 2.0.2

Compatibility: requires minimum Kimai 2.0

- Fixed: Do not auto-calculate new Kiosk code, to allow removing the last code from a user

## Version 2.0.1

Compatibility: requires minimum Kimai 2.0

- Fixed: Menu-Subscriber priority (missing in "Favorites" menu)

## Version 2.0

Compatibility: requires minimum Kimai 2.0

- Fixed: compatibility with Kimai 2.0
- BC break: Changed API URLs:
    - `/api/kiosks/kiosks` to `/api/kiosk/codes`
    - `/api/kiosks/kiosks/{id}` to `/api/kiosk/codes/{id}`

### Version 1.12

Compatibility: requires minimum Kimai 1.15

- Added: missing translation for "Code"

### Version 1.11

Compatibility: requires minimum Kimai 1.15

- Added: support **multiple codes per user**
- Added: delete single code
- Added: edit code with activity

### Version 1.10

Compatibility: requires minimum Kimai 1.15

- Added: reload scanner page every 14 minutes to prevent CSRF token / session issues (PHP default session timeout is 14 minutes)
- Added: set an **activity per user and code**, which allows to overwrite the global configured code
- Added: new setting to prevent stopping of non-kiosk activities
- Added: edit existing codes

## Version 1.9

Compatibility: requires minimum Kimai 1.15

- Added: a new configuration to prevent page reloads after login (activated by default)

## Version 1.8

Compatibility: requires minimum Kimai 1.15

- Added: API functions to load available codes (list of all codes only available to user with permission `kiosk_admin`)
- Fixed: do not display codes for disabled users
- Fixed: definitions for new Kimai version

## Version 1.7

Compatibility: requires minimum Kimai 1.14

- Added: beep (login) and boop (logout) sounds (off by default)

## Version 1.6

Compatibility: requires minimum Kimai 1.11

- Added: allow CSS customization via event
- Added: the following CSS classes, for building selectors:
    - `kiosk-login`: the kiosk login screen with the code input/scanner
    - `kiosk-login-status`: status page (started and stopped)
    - `kiosk-started`: status page after record has been started (login)
    - `kiosk-stopped`: status page after record has been stopped (logout)
    - `kiosk-users`: list of active and inactive users with avatars (features must be activated)
    - Example: hide the logo on login and logout page via Custom CSS bundle:
    ```css
    .kiosk-login-status .login-logo { display:none; }
    .kiosk-login-status .login-box-body { margin-top: 50px; }
    ```
- Added: the following new configurations
    - `hide logo`: hide logo on status pages (login and logout)
    - `hide code`: turns the code input field into a password field
- Added: a new configuration to show active users in login screen
- Added: a new configuration to show inactive users in login screen

## Version 1.5

Compatibility: requires minimum Kimai 1.11

- Added: Configuration to activate IP address logging when starting a new entry
- Added: Simplify installation (assets will be installed automatically)
- Fixed: Composer 2 compatibility

## Version 1.4

Compatibility: requires minimum Kimai 1.10

- Added "Freestyle" code format, which can be used for example:
    - with a simple keyboard (eg. door-lock)
    - RFID reader which act as keyboard (like barcode scanners)
    - see Hardware section in [README.md](README.md)
- Added new `kiosk_admin` permission (by default assigned to Super-Admins)
- Added Kiosk Admin page showing all users with attached codes (needs `kiosk_admin` permission)
- Prevent invalid time configuration in user-preferences
- Show all configured codes on user screen (highlight active type)

## Version 1.3

- Added allowed start and end times for each user (new permissions `kiosk_own_profile` and `kiosk_other_profile`)

## Version 1.2

- Fixed timezone issue

## Version 1.1

- Fixed configuration problem, removed project setting

## Version 1.0

- Initial release
התקנה
העתקת קבצים
Extract the ZIP file and upload the included directory and all files to your Kimai installation to the new directory:
var/plugins/KioskBundle/The file structure needs to look like this afterwards:
var/plugins/
├── KioskBundle
│   ├── KioskBundle.php
|   └ ... more files and directories follow here ...
פינוי המטמון
After uploading the files, Kimai needs to know about the new plugin. It will be found once the cache was re-built. Call these commands from the Kimai directory:
How to reload Kimai cache
bin/console kimai:reload --env=prodIt is not advised, but in case the above command fails you could try:
rm -r var/cache/prod/*You might have to set file permissions afterwards:
Adjust file permission
You have to allow PHP (your webserver process) to write to
var/ and it subdirectories.
Here is an example for Debian/Ubuntu (to be executed inside the Kimai directory):
chown -R :www-data .
chmod -R g+r .
chmod -R g+rw var/יצירת מסד נתונים
Run the following command:
bin/console kimai:bundle:kiosk:installThis will create the required database tables and update them to the latest version.
There are no commands defined in the "kimai:bundle:XYZ" namespace.,
then either the directory has a wrong name (must be var/plugins/KioskBundle/) or you forgot to clear the cache (look above).
התקנת משאבים
The following command will install the required assets (images, javascripts, styles):
bin/console assets:installעדכונים
Updating the plugin works exactly like the installation:
- Delete the directory
var/plugins/KioskBundle/ -
Execute all installation steps again:
- העתקת קבצים
- פינוי המטמון
- Update database with
bin/console kimai:bundle:kiosk:install - Update assets with
bin/console assets:install
תאימות
הטבלה הבאה מכילה השוואה בין התוספים לבין גרסת ה־Kimai המזערית הנדרשת.
| גרסת מאגד | גרסת Kimai מזערית |
|---|---|
| 2.6.0 - 2.8.0 | 2.11.0 |
| 2.5.0 | 2.1.0 |
| 2.4.1 | 2.0.35 |
| 2.4.0 | 2.0.33 |
| 2.3.0 - 2.3.1 | 2.0.29 |
| 2.2.1 | 2.0.20 |
| 2.0 - 2.2.0 | 2.0 |
| 1.8 - 1.12 | 1.15 |
| 1.7 | 1.14 |
| 1.5 - 1.6 | 1.11 |
| 1.4 | 1.10 |
| 1.0 - 1.3 | 1.8 |
צילומי מסך

רכישה
Read more about the license for this item here
You can buy the plugin via Lemon Squeezy (CreditCard, instant access) or from the developer (bank-transfer, up to one week)
Support-questions, bug-reports and feature-requests will be answered in this Github repository
